
The Ultimate Guide to Home Coffee Brewing: EVERYTHING You Need to Know
Home brewing has taken off in a big way over the last few years, especially with all the fantastic products, equipment, and bean availability we now enjoy.
Both brick-and-mortar and online stores are full of the stuff.
But say you roll out of the sack when your alarm rings, and you're thinking about getting into the day the best way with a cuppa, but the coffee just isn't hitting the sweet spot. What are you meant to do about it?
Well, that's a sign to take matters into your own hands and actually get involved with coffee in the most satisfying way possible.
Just picture it.
That rich, potent aroma of freshly brewed coffee, which you yourself brewed to perfection, just the way you like it. Imagine having that skill. That knowledge and ability to get it right every time.
Hey, this isn't an outback adventure; rather, it's an art—an exciting journey that tosses you right into a captivating universe of flavours, textures, and aromas.
This guide is how you make that happen - the ultimate guide to home coffee brewing. From cracking the secret of coffee beans to mucking around with the bouncy energy of coffee machines, this guide will cover all you need to bring out your inner barista.
Let's get straight into it.
An Introduction to Home Brewing Coffee
Coffee always starts with beans, and let's get one thing straight, mate: not every bean's the same. Different beans mean different cups of coffee. When you know how to choose and brew a bean, you know how to make a coffee.
Let's start by dusting off the history books a bit.
A Brief History and Types of Coffee Beans
Legend has it that the story of the magic coffee bean began around the 9th century amongst the lush highlands of Ethiopia.
Here, a humble Ethiopian goat herder named Kaldi is claimed to be the first to discover coffee after finding his goats unusually active after munching on red berries.
Intrigued, Kaldi quickly shared his observation with the local monastery.
After stashing some beans packed in his robes, a trader travelled to the port of Mocha (you see where this is going) in Yemen. It wasn't long before the hallowed port became the pulsing heart of the coffee trade, fuelling the spread of the beans across the Arabian Peninsula.
All the while, coffee consumption flourished, birthing the first-ever coffee houses in the Arabian region.
As the beans danced across the globe, they piqued the curiosity of European travellers.
Europe was soon caught in coffee's euphoric embrace, and by the 17th century, coffee houses sprouted throughout the continent. These houses went beyond mere establishments—they were society's social and political lifeblood, brimming with vibrant exchanges and intellectual conversations.
The coffee revolution had begun and pretty much hasn't stopped to this day.
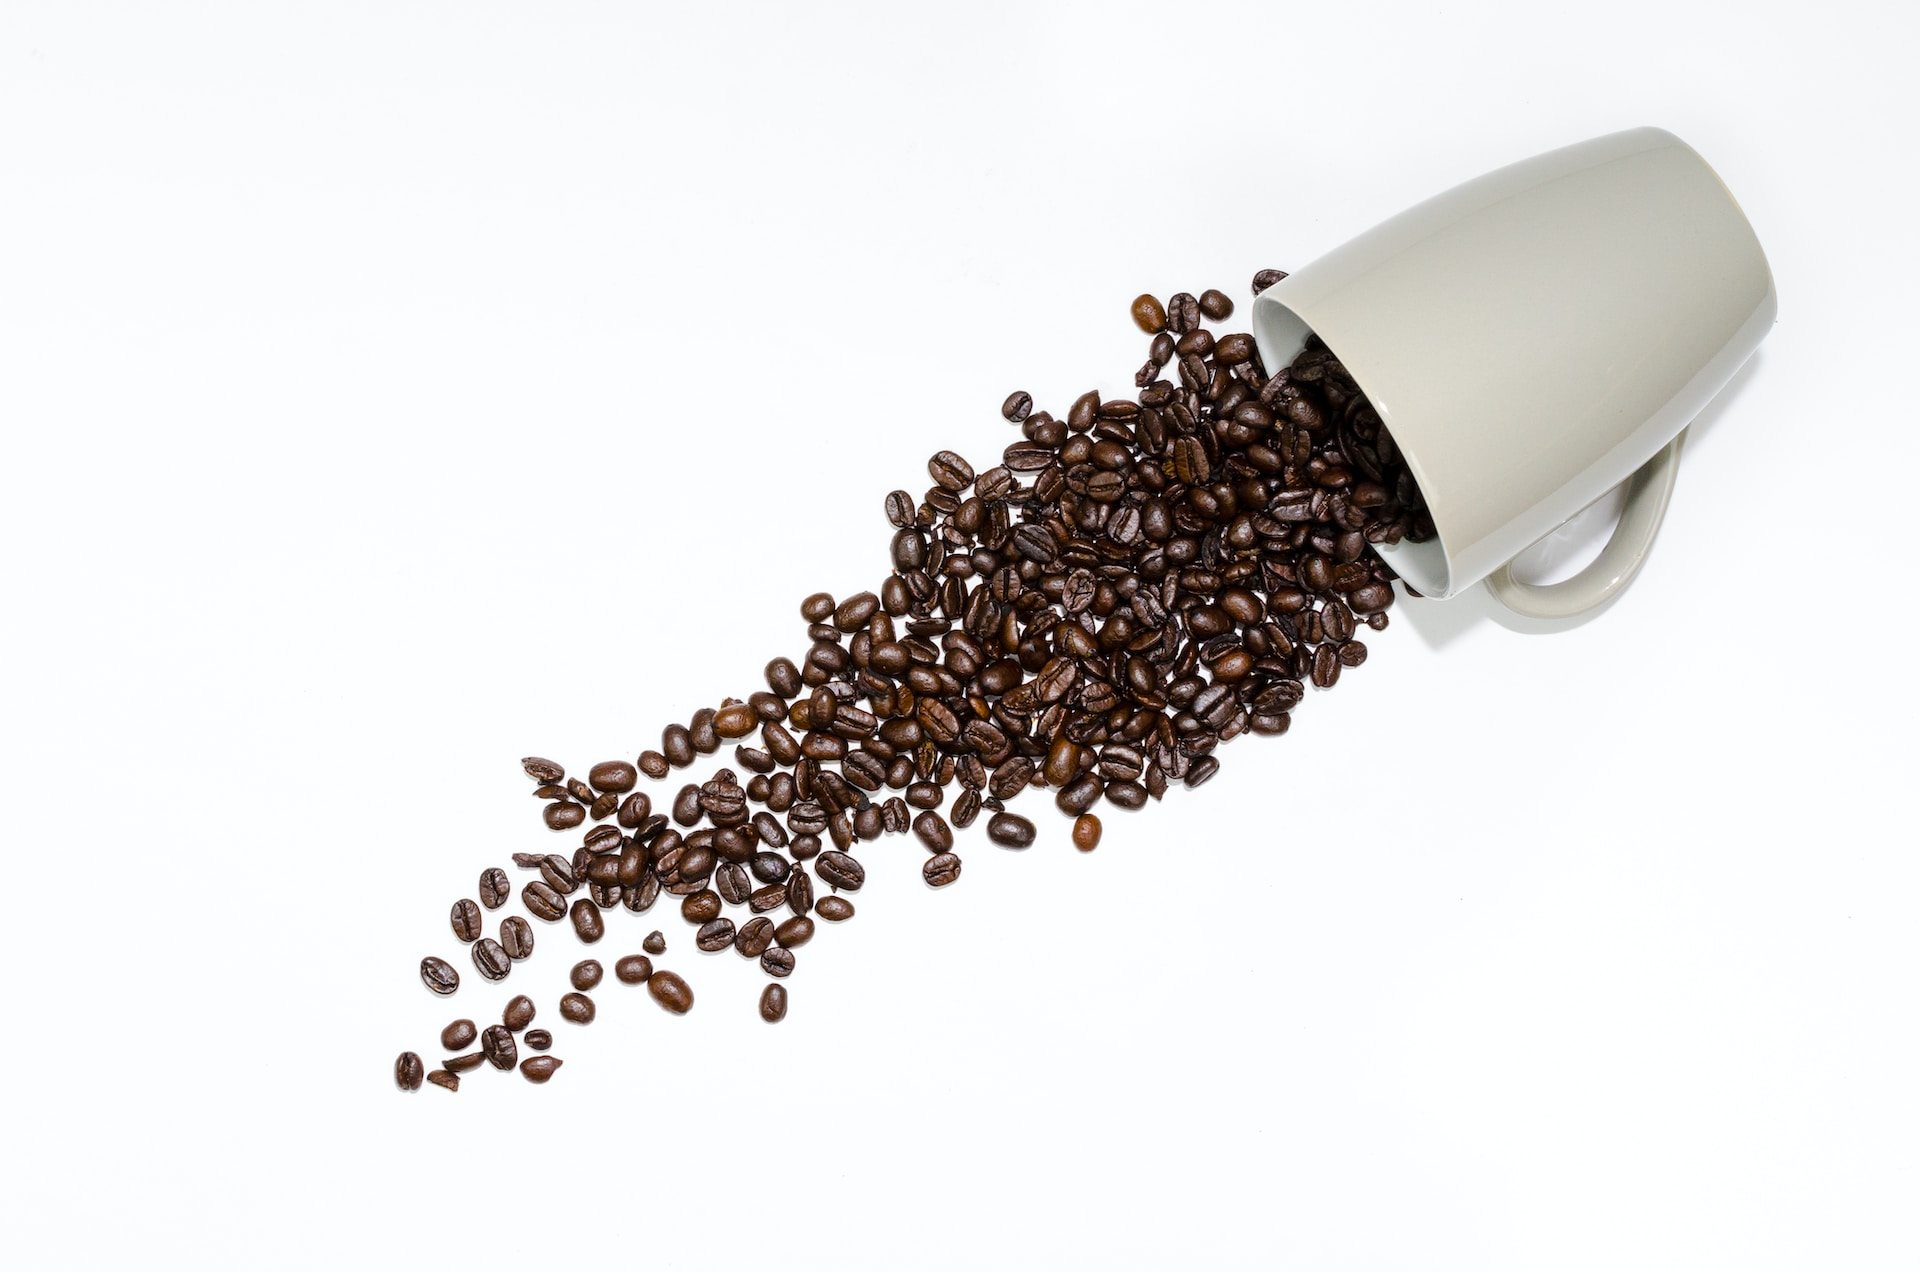
Getting Started with Your Coffee Beans
Thankfully, there's no need to saddle up your camel or hit dusty Arabian trade routes to find your perfect beans. Although that does sound like a lot of fun. Your hunt begins right in your local town or by shopping online.
You can pretty much buy any kind of coffee you want these days and have it shipped to you, which means there's really no excuse when it comes to having the best coffee experience possible.
Here's the deal: getting into the world of home coffee brewing is all about commitment and a quest for quality, much like coffee merchants of old. So, let's take that spirit of authenticity and jump into our modern, coffee-loving era.
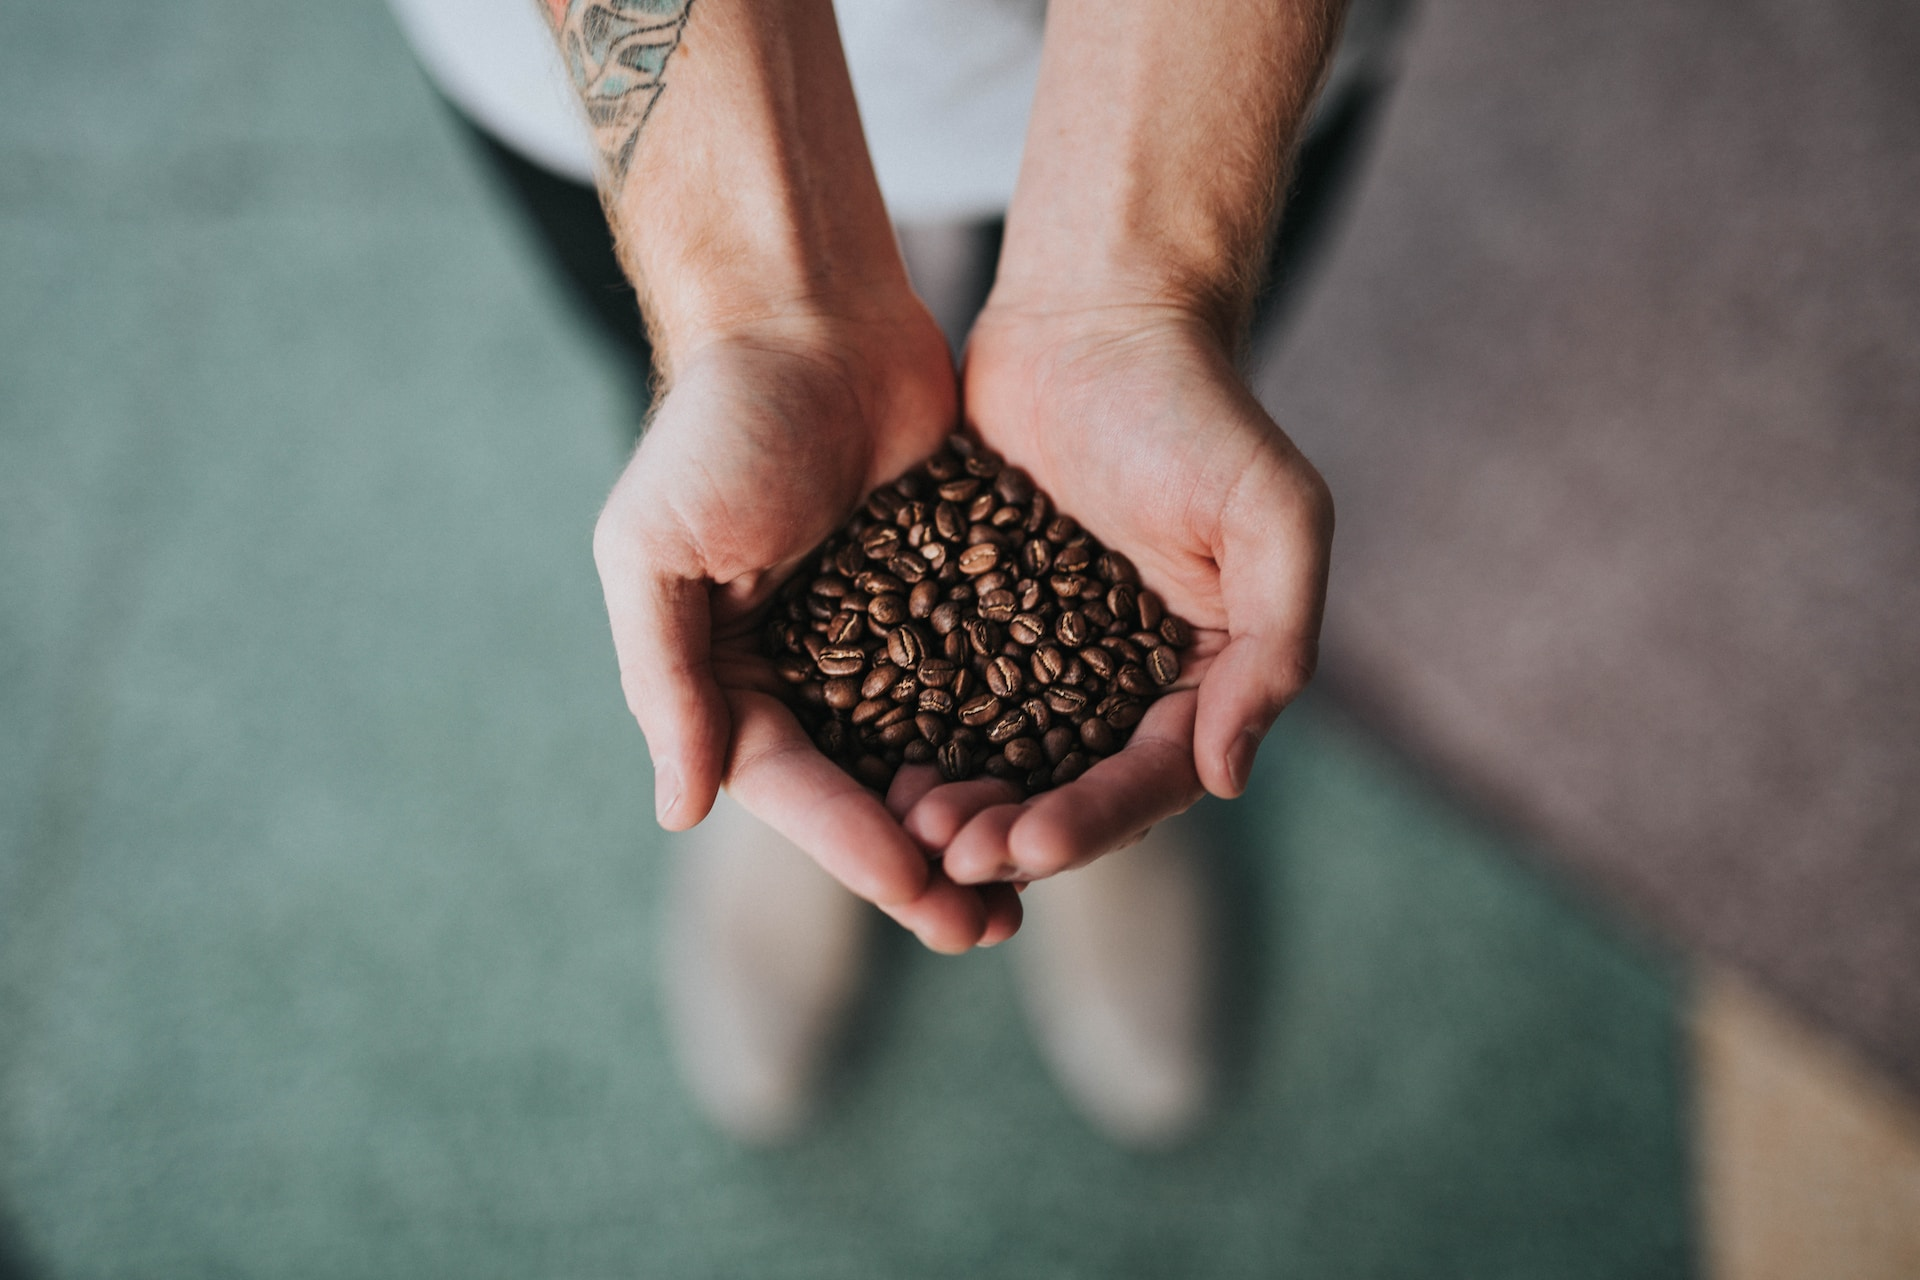
Know Your Beans
There are countless varieties of coffee beans out there, so doing a bit of homework can go a long way. Learn your Arabicas from your Robustas, and don't forget to explore regional differences, too.
For instance, Ethiopian coffee will offer a different kick to its Brazilian counterpart.
That said, we could sit here all writing about all the different beans, their flavours, and what they have to offer. That's a book in itself.
The best advice we can give you is this - experiment.
Think of coffee brewing as an adventure where you can sample finely ground coffee beans from all over the world, discover your likes and dislikes your favourites, and educate yourself through actual hands-on experience.
It doesn't get better than that, and it's far better and more immersive than reading a guide or someone else's experience.
Sure, starting out is hard because you may not have developed or refined your taste, but it will come. Just give it time.
That said, here are some ideas as your jumping-off point:
A Quick Guide to Coffee Bean Types and Tasting Experience
Here's a short list of popular coffee bean types, their flavour profiles, and the kind of drinking experience they offer.
Arabica (Coffea arabica)
-
Flavours: Mild, nuanced flavours, often with fruity, floral, or chocolate notes.
-
Drinking Experience: Smooth and balanced, low acidity and bitterness, with a softer taste.
-
Best For: Coffee drinkers who appreciate delicate flavours and a less intense brew.
Robusta (Coffea canephora)
-
Flavours: Earthy, nutty, and bold, with hints of cocoa and dark chocolate.
-
Drinking Experience: Full-bodied with a strong, intense taste, high acidity and bitterness.
-
Best For: Coffee drinkers who crave a gutsy cup and don't mind a rugged punch of flavour.
Colombian (Arabica)
-
Flavours: Bright, fruity notes, often with a caramel sweetness and slight nuttiness.
-
Drinking Experience: Medium-bodied, well-rounded, and balanced, with a pleasant acidity.
-
Best For: Coffee enthusiasts who enjoy a rich taste without excessive bitterness.
Ethiopian (Arabica)
-
Flavours: Bright, floral, or fruity notes like blueberry, with hints of tea-like characteristics.
-
Drinking Experience: Complex and layered, often with a lighter body and bright acidity.
-
Best For: Adventurous coffee fanatics who appreciate the nuances of unique flavour profiles.
Brazilian (Arabica & Robusta)
-
Flavours: Predominantly nutty, chocolatey, and sweet, with low acidity.
-
Drinking Experience: Medium to full-bodied, with a creamy mouthfeel and lingering aftertaste.
-
Best For: Coffee drinkers who favour a comforting, velvety brew with rich flavours.
Sumatran (Arabica)
-
Flavours: Earthy, spicy, and herbal, with a hint of cocoa.
-
Drinking Experience: Full-bodied and creamy, with low acidity and a complex aroma.
-
Best For: Coffee connoisseurs who enjoy bold flavours and aren't afraid to venture into more exotic tastes.
Keep in mind that each bean type can exhibit variations in flavour and drinking experience based on the specific region, roast, and processing method.
Find Yourself a Reliable Supplier
Next up? Lock in a reputable supplier. They're the gatekeepers to the world of flavours.
When looking for a coffee bean supplier, here are some key points to consider:
-
Quality and Variety of Beans: Top priority is placed on the taste and aroma of the beans, and suppliers should offer a range of bean types and origins to suit different palates.
-
Freshness: The supplier should be committed to providing freshly roasted beans. The roast date should always be displayed clearly on the packaging.
-
Sourcing Ethics: Ideally, the supplier should source the beans ethically, ensuring fair treatment to farmers. Look for certifications like Fairtrade orirect Trade.
-
Transparency: Reputed suppliers value transparency about the origin of the beans, the crops, farming practices, and the entire supply chain.
-
Environmental Considerations: A conscious supplier would prioritize sustainability in its practices. This could be by offering organic coffee or using environmentally friendly packaging.
-
Customer Service: Excellent customer service, whether in terms of assistance with selection, delivery options, or dealing with potential issues, can set a great coffee supplier apart from the rest.
-
Pricing: While quality is tantamount, the supplier's prices should be fair and reflect the quality and service provided.
Remember, the best coffee supplier for you will depend not only on these factors but also on your personal preference, including how much you're willing to spend, the level of importance you place on ethical sourcing and the tastes you prefer.
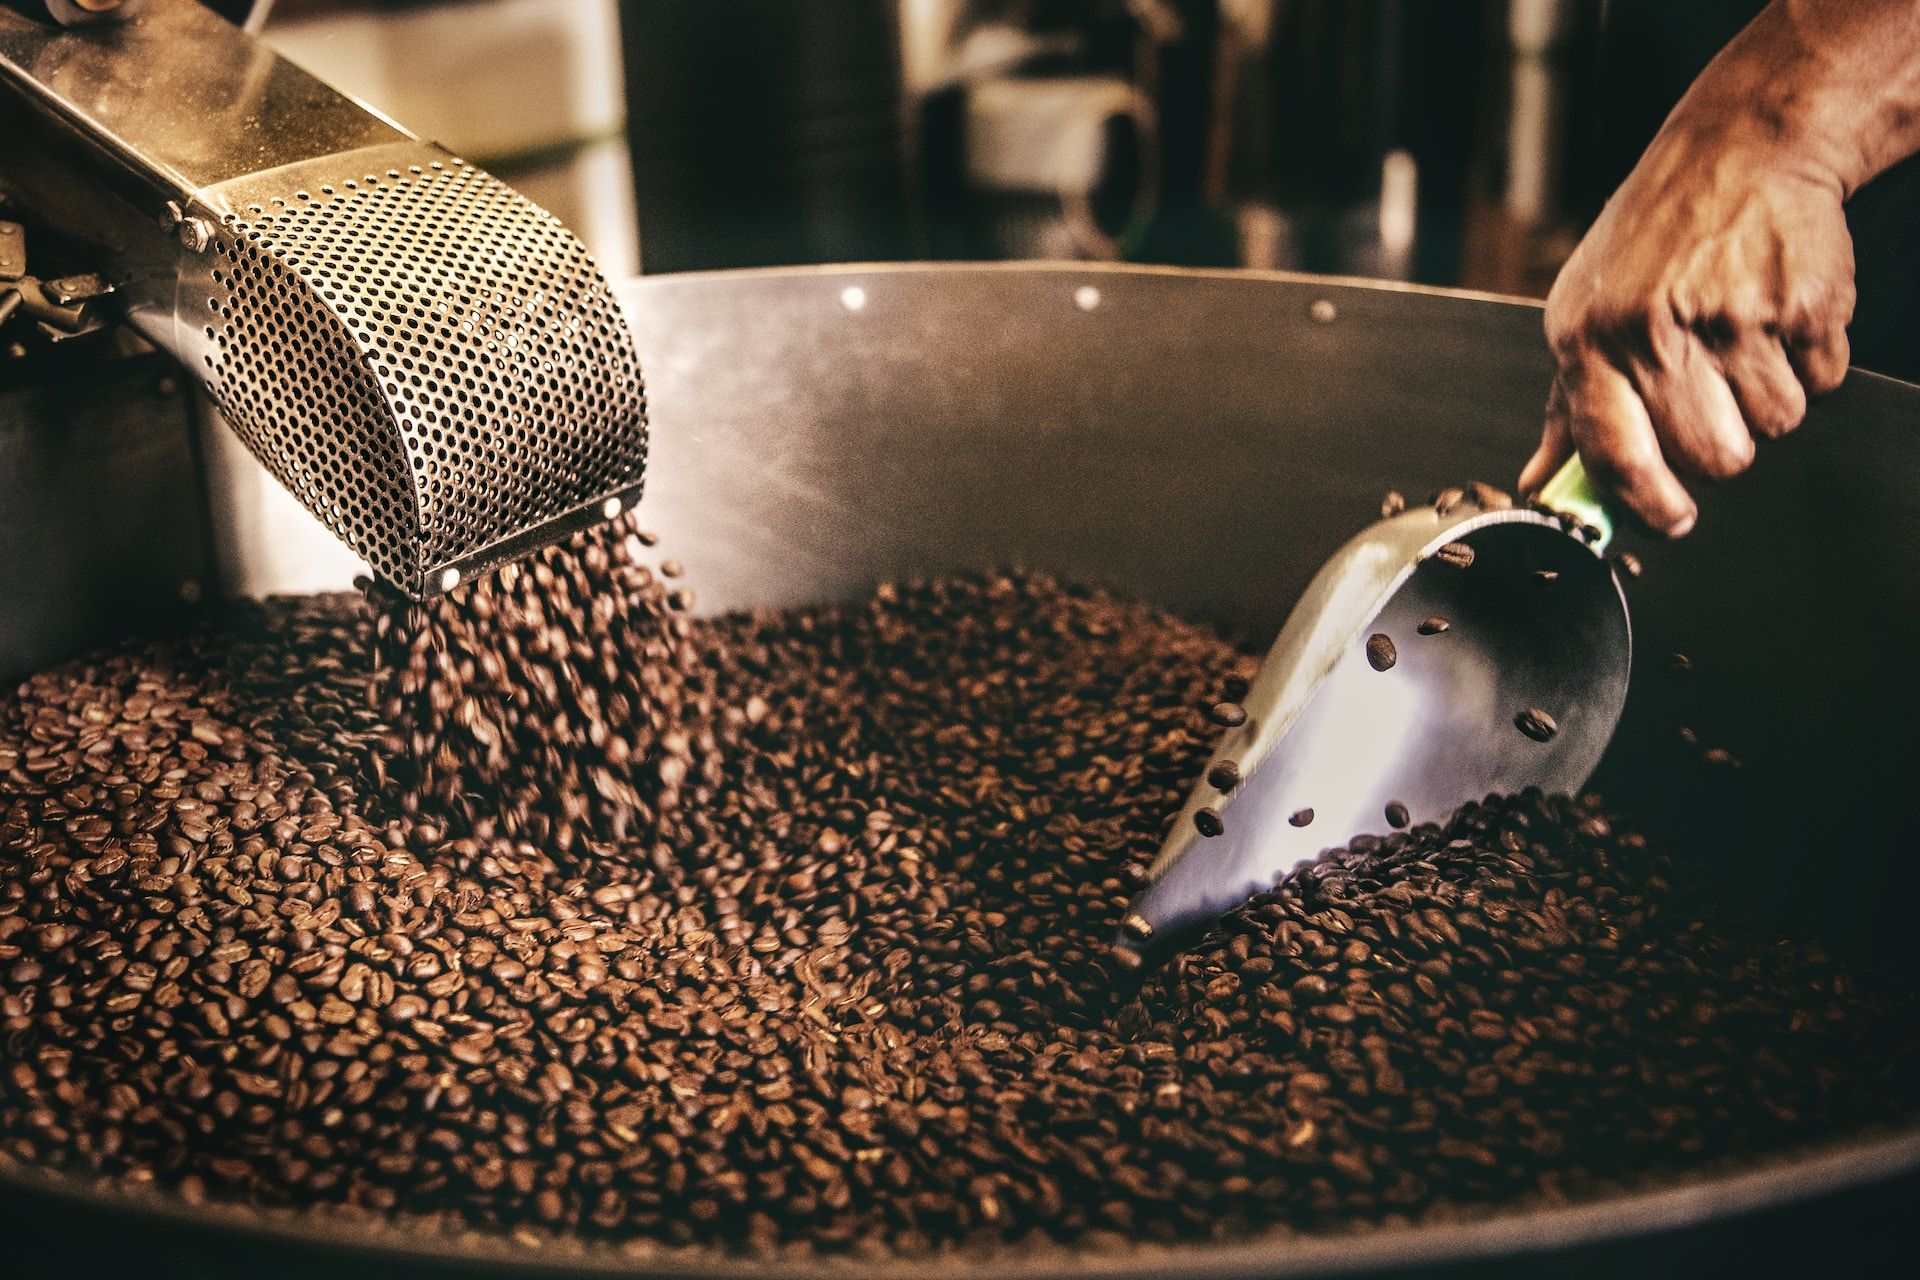
Check the Roast Date
And finally, pay attention to the roast date.
Freshness is crucial when it comes to coffee beans. Their magic lies in their ephemeral bloom, with beans peaking between a sweet spot of two to fourteen days post-roast.
But remember—older isn't worthless.
Aged beans can offer a delightful alternative flavour, often mellower and less acidic.
So, whether you prefer a fresh, vibrant brew or a more tranquil, aged cup, tracking the roast date adds an extra layer to your coffee experience.
A Complete Guide to Coffee Home Brewing Methods
Righto, let's get down to business. We're talking about MECHANICS here, mate.
This will be a comprehensive guide, so make sure you've got a notepad and perhaps the last average cup of coffee you'll ever have because we're diving deep.
Let's take a squizz at these coffee machines, the process, and what you need to know. By the end of this section, you should have a pretty clear idea of what home brewing method you want and how to get started.
Automatic Coffee Machines
All-in-one convenience for that no-fuss first cup of the day
Automatic coffee machines are your trusty morning sidekick, whipping up a cuppa with minimal fuss. They've got built-in grinders and brewers, streamlining the process to save you time.
Just add water and beans, hit the button, and boom - hot cuppa Joe ready for the chugging!
No need to grind, measure or get technical. These babies do it all for you on autopilot. Want an espresso or latte? Done. Strong, mild or somewhere in between? You got it.
It's hassle-free coffee brewing with a custom taste. Top up the water, beans, milk, press a button and walk away. Your machine's got your back.
For when you need caffeine without the drama.
Choose this if You appreciate consistency, convenience, and the ability to make café-worthy coffee at home without going into the nitty-gritty of manual brewing.
Who it's for: Busy coffee lovers who enjoy the taste of freshly brewed coffee but appreciate the convenience and time saved with automation.
What You Need
-
Automatic coffee machine
-
Fresh coffee beans or grounds
-
Water
Difficulty Level: Piece of cake (1/5)
Step-by-Step Instructions
-
Fill the water reservoir to the required level. Use filtered water to preserve your machine and keep your brew tasty.
-
Add coffee beans to the grinder or pop in the grounds to the designated compartment.
-
Select the desired brew strength – some machines offer options like mild, medium, or strong.
-
Hit the start button. Sit back and let your trusty machine work its magic.
-
Once your brew is ready, pour your cuppa into your favourite mug and enjoy!
Tips for the Best Results
-
Choose a machine that offers some adjustability to match your preferences, at least in brew strength.
-
Go for fresh coffee beans or recently ground coffee for maximum flavour.
-
Clean your machine regularly – a dirty machine leads to a dodgy-tasting coffee, which nobody wants!
-
Experiment with different beans or grind settings if your machine allows it because, who knows, you might just stumble upon the perfect brew!
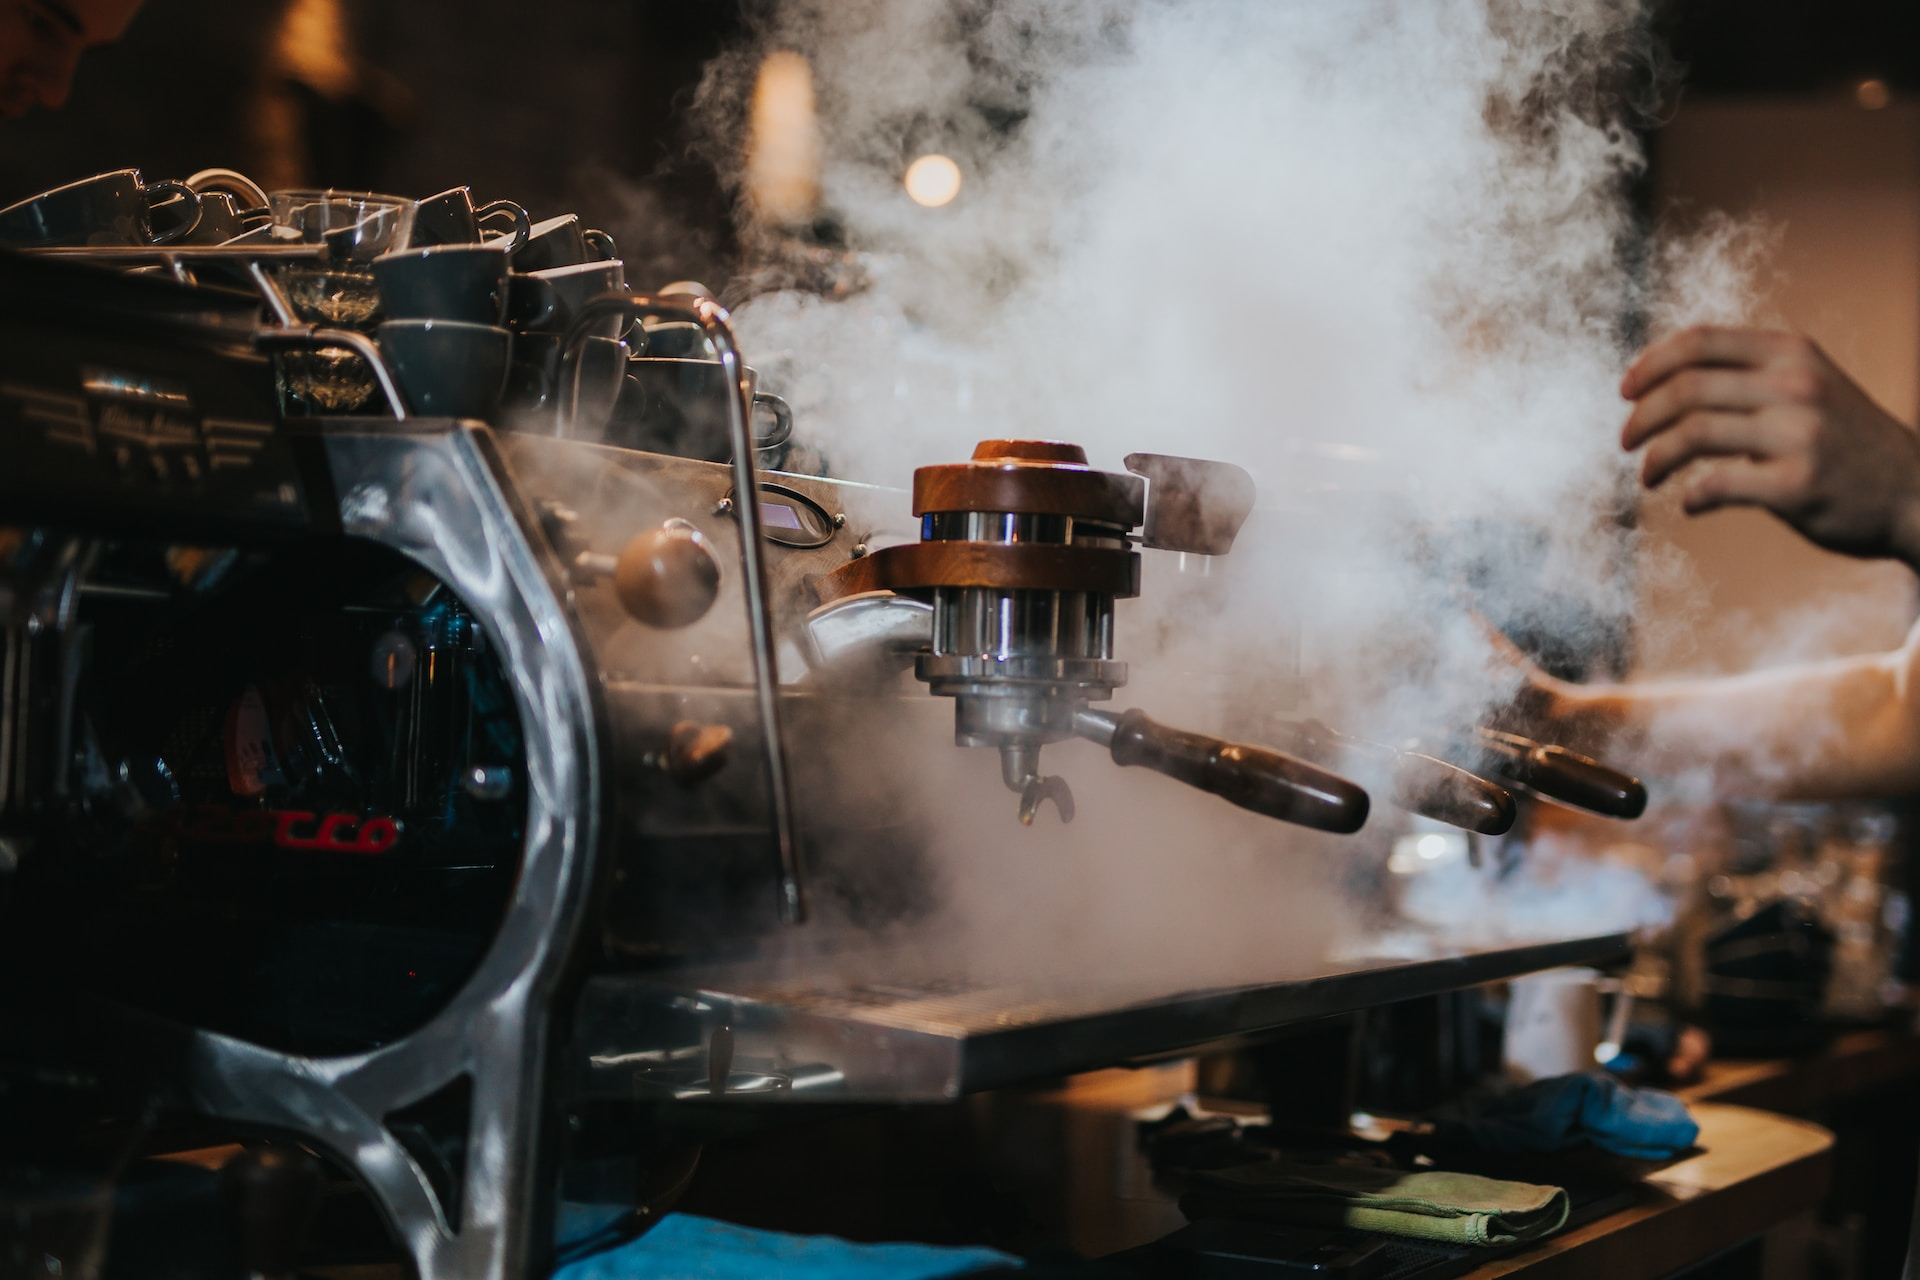
Semi-Automatic Coffee Machines
A hands-on journey to the Holy Grail of Espresso
Semi-auto coffee machines are a coffee lover's best mate. These espresso kings hand you way more control while still getting your hands dirty - figuratively, of course!
The machine handles the pump pressure, but everything else is your kingdom - grind setting, tamping, water flow, it's all you, baby.
It's a fun, hands-on adventure - grind those fresh beans, tamp just right, pull your shots and froth that milk like a champion. You're the boss here.
Dialing in the variables takes practice, but stick with it, mate. When everything comes together, these machines deliver café-quality espresso and milk froth that'll knock your socks off.
Of course, there's a learning curve. You'll make mistakes, get frustrated, pull a few dud shots. But it's worth it. Master a semi-auto, and you can craft heavenly espresso just how you like it.
Choose this if: You enjoy having some element of control over the brewing process whilst keeping the task manageable with partially automated features. These are also your typical espresso machine models
Who it's for: Coffee enthusiasts who still want a hands-on experience with their brewing but prefer having some stages of brewing simplified.
What You Need
-
Semi-Automatic Coffee Machine
-
Coffee Grinder
-
Fresh Coffee Beans
-
Water
-
Tamper
Difficulty Level: Requires Some Effort (3/5)
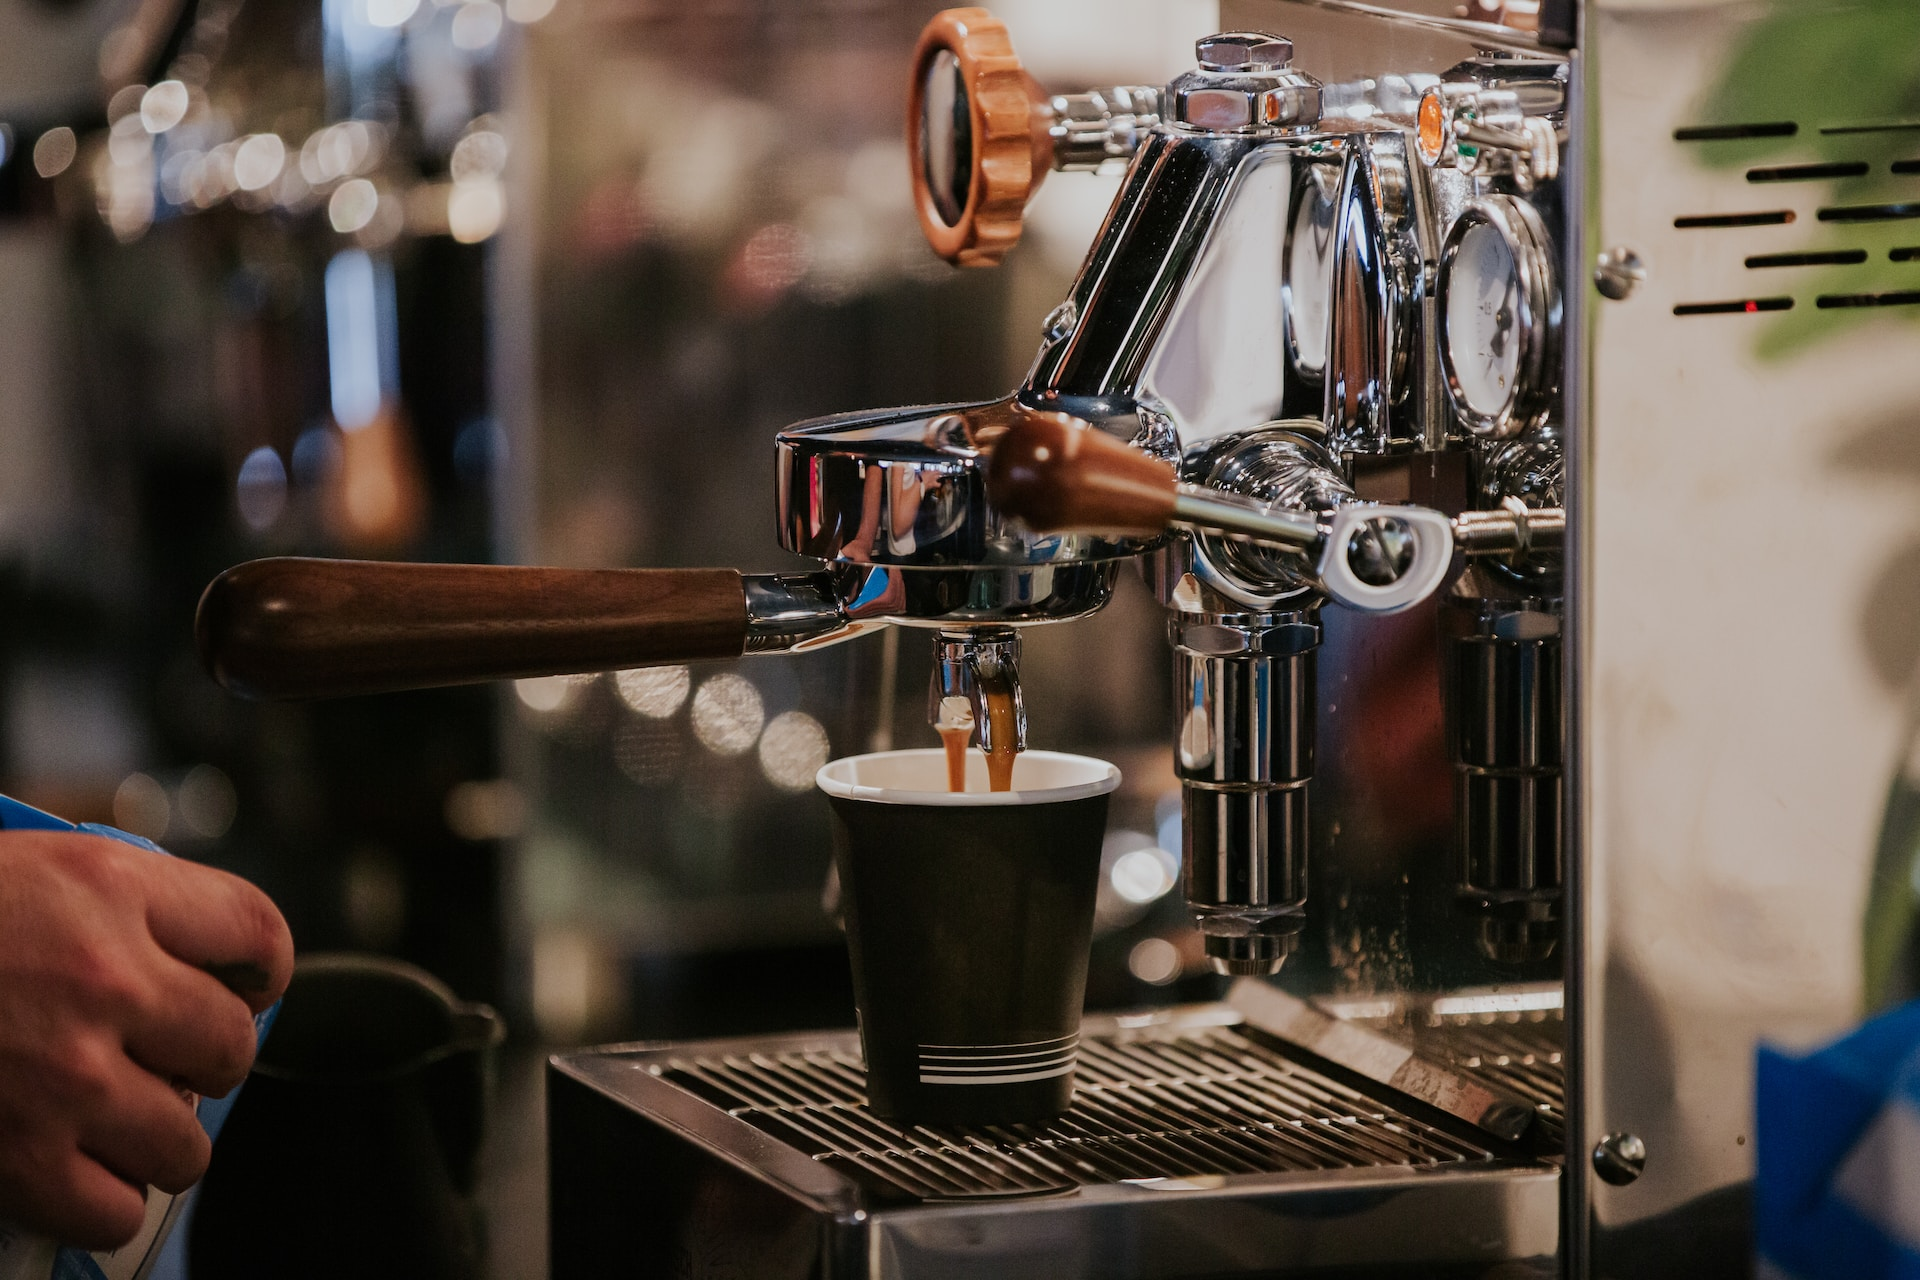
Step-by-Step Instructions
-
Pour filtered water into the machine's reservoir.
-
Place fresh whole beans into your grinder and grind them to a cinnamon-like consistency — neither too coarse nor too fine.
-
Put the ground coffee in the portafilter and tamp appropriately — firm, but not a Hulk-like smash. It's more about consistency than brute force.
-
Attach the portafilter to your machine.
-
Start the water and keep an eye on the shot — you should aim for a steady stream, not a rocket blast or a trickling creek.
-
Stop the water once you've extracted enough coffee.
Tips for the Best Results
-
The freshness of the grind is crucial. Use freshly ground beans every time.
-
Invest in a decent grinder, as grind consistency can literally make or break your espresso.
-
Be patient. Practice is key here. You're most likely not going to pull a perfect shot on your first go.
-
Remember to regularly clean your machine and grinder to avoid stale coffee residue affecting your brew.
Manual Coffee Machines

And next, we jump into the realm of manual coffee brewing methods. Where every brew becomes a personal tale of twists and turns, and you're the captain of your caffeinated ship. Let's explore these various brew methods, shall we?
French Press (a.k.a. Plunger/Press)
The Trusty Workhorse That Brews with Finesse
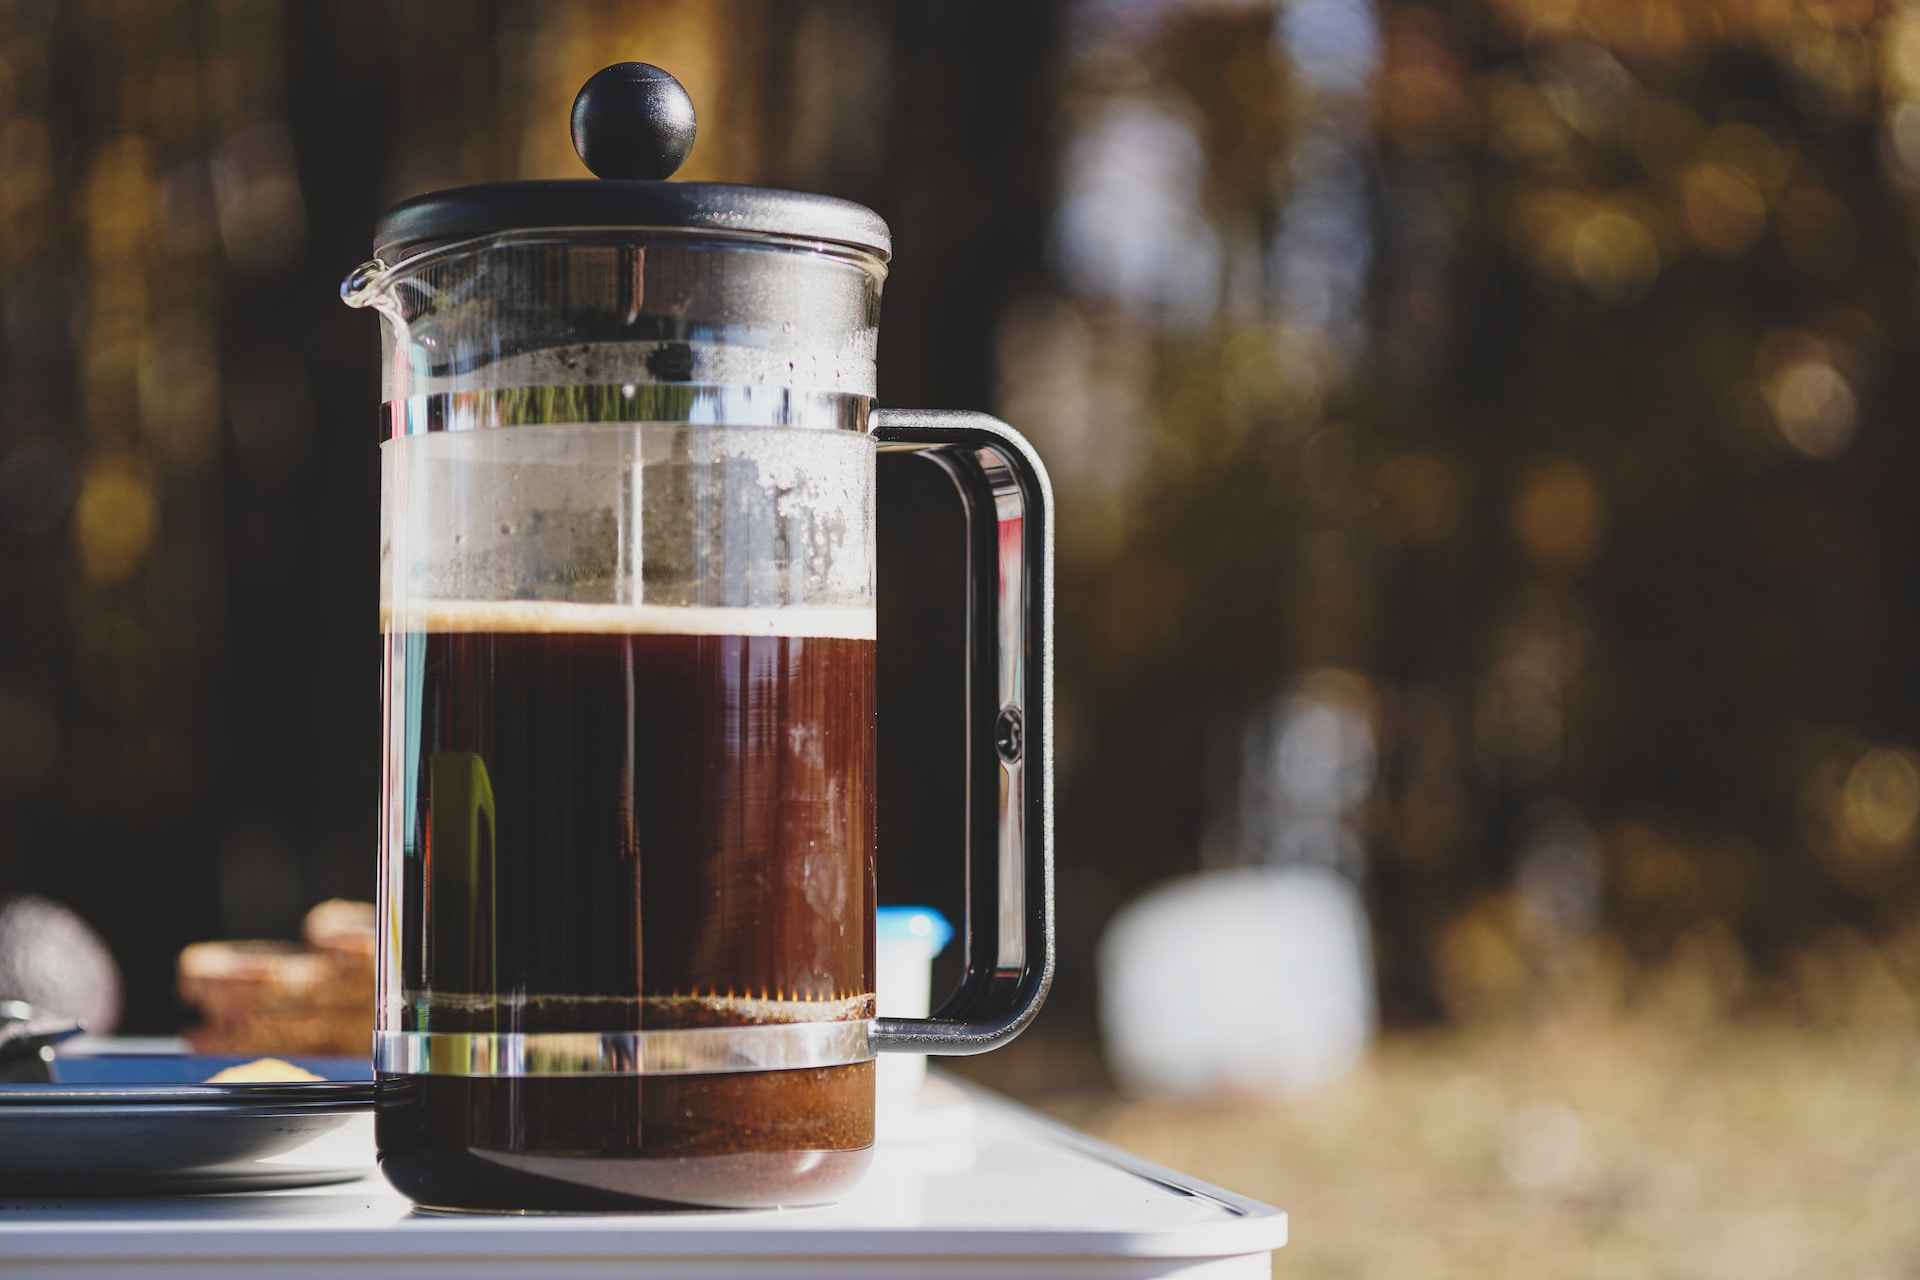
The French Press is like your ol' reliable mate - straight up, always there for ya, never lets you down.
By steeping the grounds right in hot water, this tried-and-true method makes a robust cup of joe to match your heartiest brekkie.
No fancy gear needed, just good quality beans, water heated to the sweet spot, a jar, plunger and time. The longer the brew, the more the flavours infuse - strong, intense, often with a kicks-like-a-mule kinda edge.
It's a back-to-basics, no-fuss brewing experience. Scoop in the grounds, add the hot water, let it steep, then press and pour. Straightforward as it gets.
But don't underestimate the French Press. In the right hands, it brings out the full-bodied richness and oils of those coffee grounds for a mighty satisfying cup.
Rugged, reliable brewing with maximum flavour - that's the French Press way. It's always got your back, ready to start your day strong.
Choose this if You love a robust, full-bodied brew and want an accessible and straightforward method.
Who it's for: Coffee hobbyists drawn to a thicker mouthfeel, with acceptance for some fines (tiny coffee bits) in their cup.
What You Need
-
French Press
-
Freshly roasted coffee beans, coarsely ground
-
Hot water (between 93-96°C/200-205°F)
-
Timer
Difficulty Level: Brewer's Delight (2/5)
Step-by-Step Instructions
-
Prep your French Press by preheating it with hot water. Swirl it around and then dispose of the water.
-
Measure out your freshly roasted coffee beans. A general rule of thumb is a 1:16 ratio (1 part coffee to 16 parts water). For example, use 30g of coffee for 480ml of water.
-
Grind the beans to a coarse consistency, resembling sea salt.
-
Add the coffee grounds to the preheated French Press.
-
Pour hot water (93-96°C/200-205°F) evenly over the coffee grounds, filling it halfway. Start a timer and let the coffee bloom for 30 seconds.
-
Using a spoon or a paddle, gently stir the grounds to ensure they're evenly saturated.
-
Fill the French Press with the remaining hot water and place the lid atop with the plunger resting just above the water level. Steep the grounds for another 3 minutes and 30 seconds, making the total brewing time 4 minutes.
-
Slowly and steadily press down on the plunger until it reaches the bottom. Time to pour and savour your delicious coffee.
Pro Tips
-
Always use freshly roasted coffee beans for the best taste profile.
-
Experiment with the water-to-coffee ratio to achieve your preferred strength.
-
Don't rush the plunging process. Take your time to avoid stirring up the grounds and creating an overly strong or bitter cup.
-
Clean your French Press thoroughly after use to prevent any lingering residue from impacting future brews.
And voilà! With a little practice, you'll be brewing exceptional French Press coffee in no time.
AeroPress Brew
The Exhilarating Jack-of-All-Trades Coffee Companion
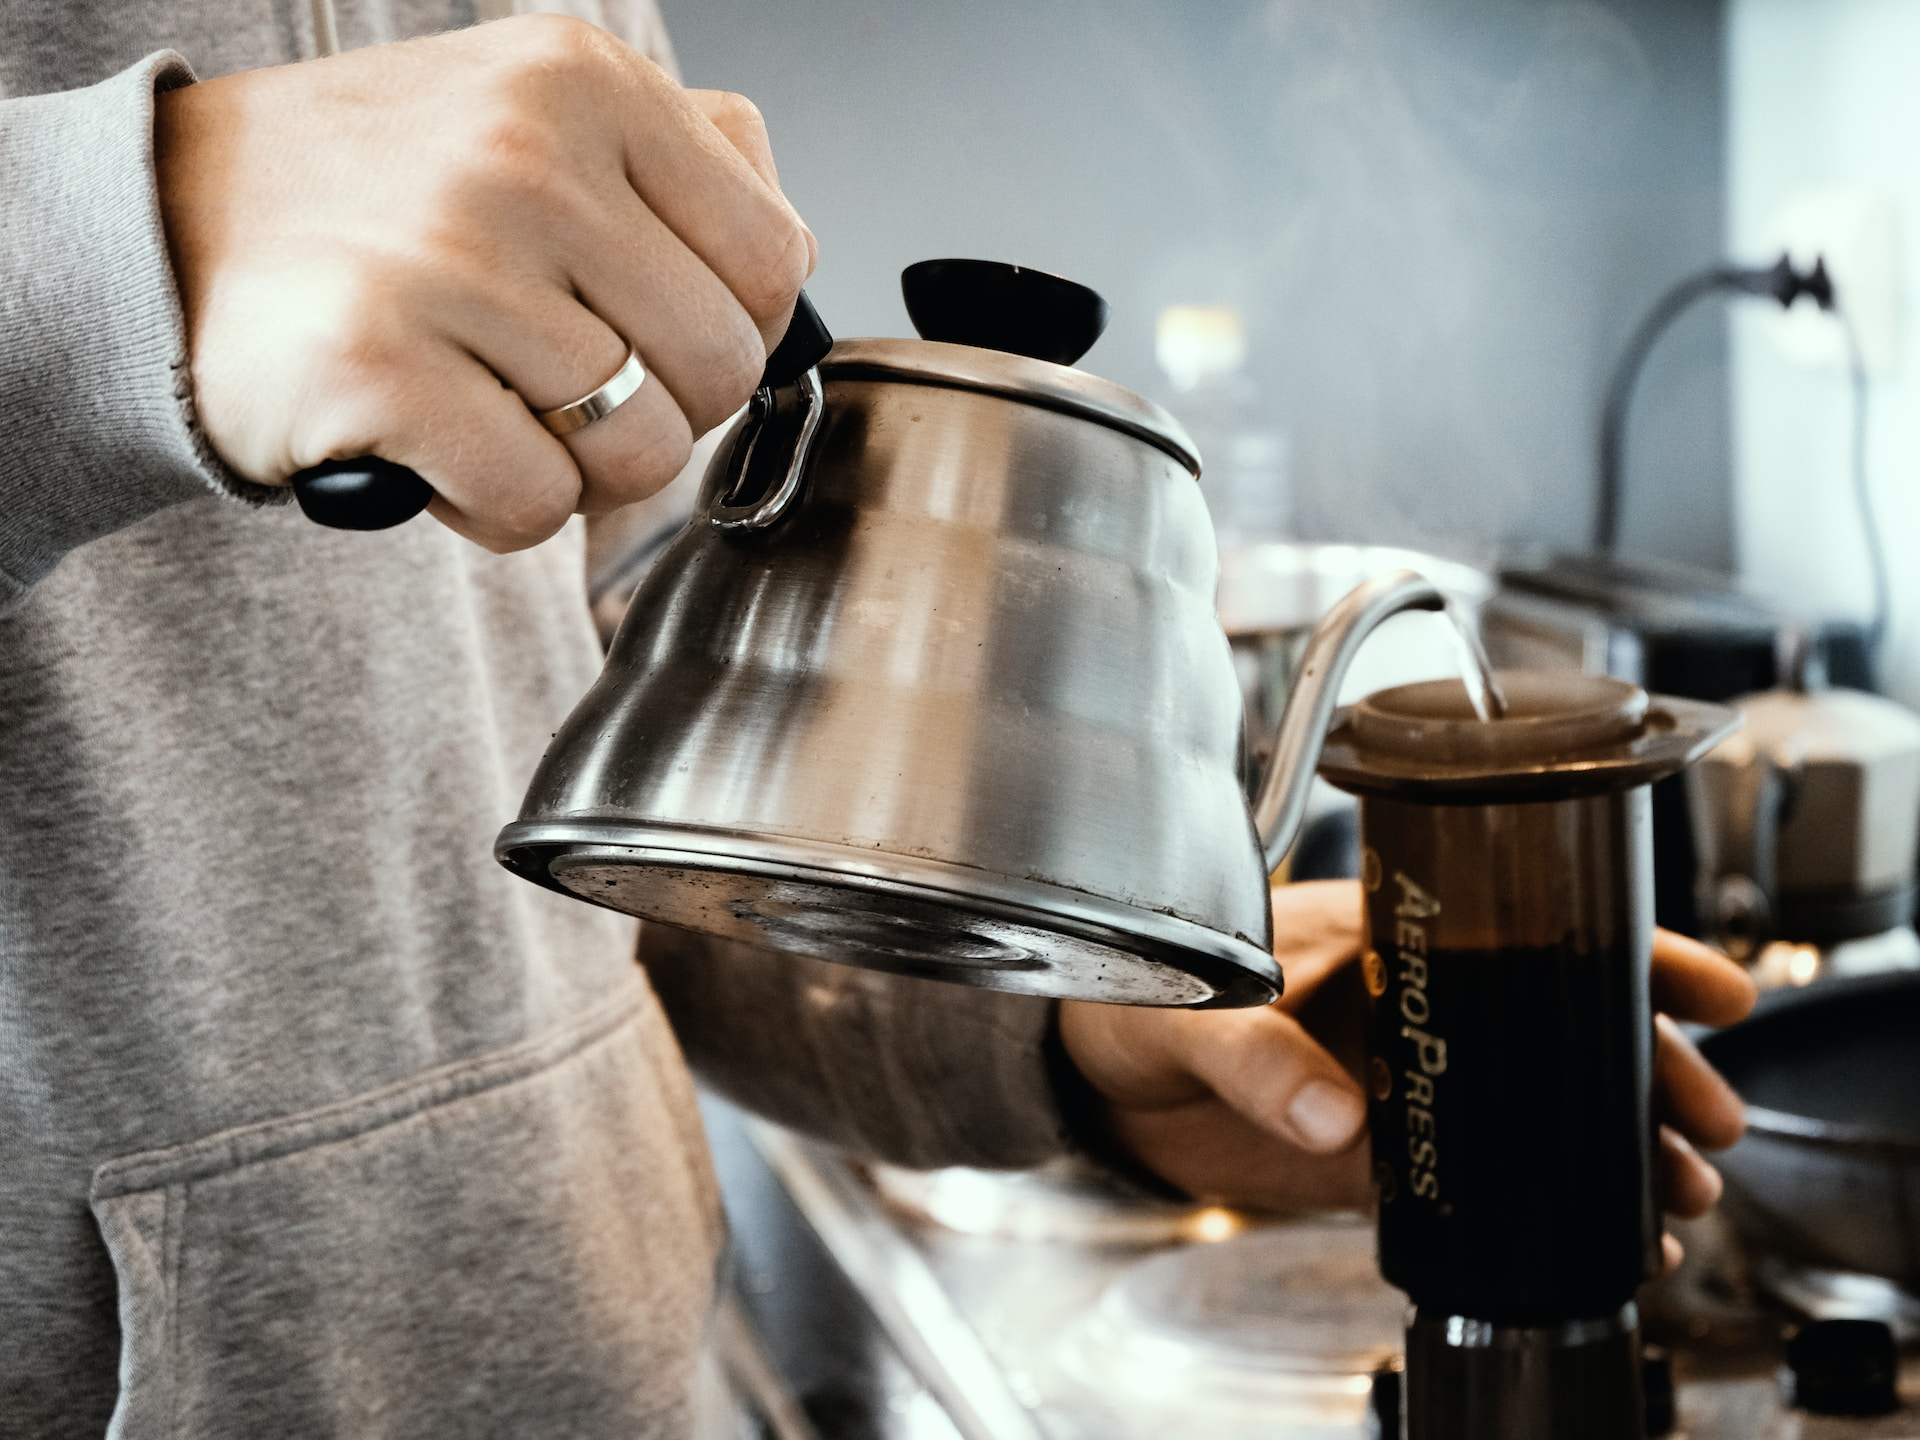
Get your brewing alchemy on with the AeroPress - the Swiss Army knife of coffee. It blends infusion and espresso techniques for versatile, inventive and super-efficient brewing.
This little wonder's your go-to for crafting a perfect cuppa anywhere, anytime.
Pop it together, add your grounds, pour in the water, give it a stir and press - voila, out comes liquid gold! It's brewing made simple and fuss-free.
But don't let its ease fool ya. The AeroPress has moved.
Play around with water temperature, steep time, grind size, and pressure, and it'll dance to any tune - from a rich, intense espresso shot to a light, fruity filter-style brew.
Strong, smooth, and fine-tuned to your tastes - the AeroPress brews up gorgeous coffee with minimum gear. Toss it in your pack; you've got quality caffeine everywhere you wander.
Choose this if You appreciate control over your brew, want a quick cup, and enjoy experimenting.
Who it's for: Enthusiastic home baristas who don't mind hands-on brewing; great for solo drinkers or travellers, given its portability and self-cleaning design.
What You Need
-
AeroPress
-
Freshly roasted coffee beans, ground to medium-fine
-
Hot water (preferably 85-92°C/185-198°F)
-
AeroPress paper filter
-
Timer
-
Stirrer or spoon
Difficulty Level: Brewmaster's Playground (3/5)
Step-by-Step Instructions
-
Assemble your AeroPress by setting the plunger slightly inside the brewing cylinder. Secure a clean filter in the cap and attach it to the cylinder.
-
Calculate your coffee beans according to your taste. A good starting ratio is 1:16 (coffee to water). For instance, try 15g of coffee to 240ml of water.
-
Grind the coffee beans to a medium-fine consistency, akin to table salt.
-
Position your AeroPress over your cup or carafe and introduce the ground coffee into the brewing cylinder.
-
Saturate the coffee grounds with a portion of your heated water (85-92°C/185-198°F). Allow a 30-second breaking period to allow any trapped gases to escape and ensure an even extraction.
-
Follow up by pouring the remaining hot water into the cylinder, ensuring an even saturation. Use your stirrer for gentle agitation.
-
Allow a brewing period of approximately 1 minute and 30 seconds, resulting in a total contact time of roughly 2 minutes.
-
With a firm hold on your AeroPress, gradually apply pressure to the plunger until you detect a telltale hissing sound.
Pro Tips
-
Grind size, water temperature, and steeping time can all be adjusted to tailor your perfect brew.
-
Explore both standard and inverted coffee brewing methods to achieve different taste profiles.
-
Applying consistent pressure on the plunger will ensure a smooth, balanced extraction.
The AeroPress invites an element of playful exploration into the world of manual coffee brewing. With an open mindset and a love for tinkering, you can tailor your brew precisely to your preference with this versatile little gadget.
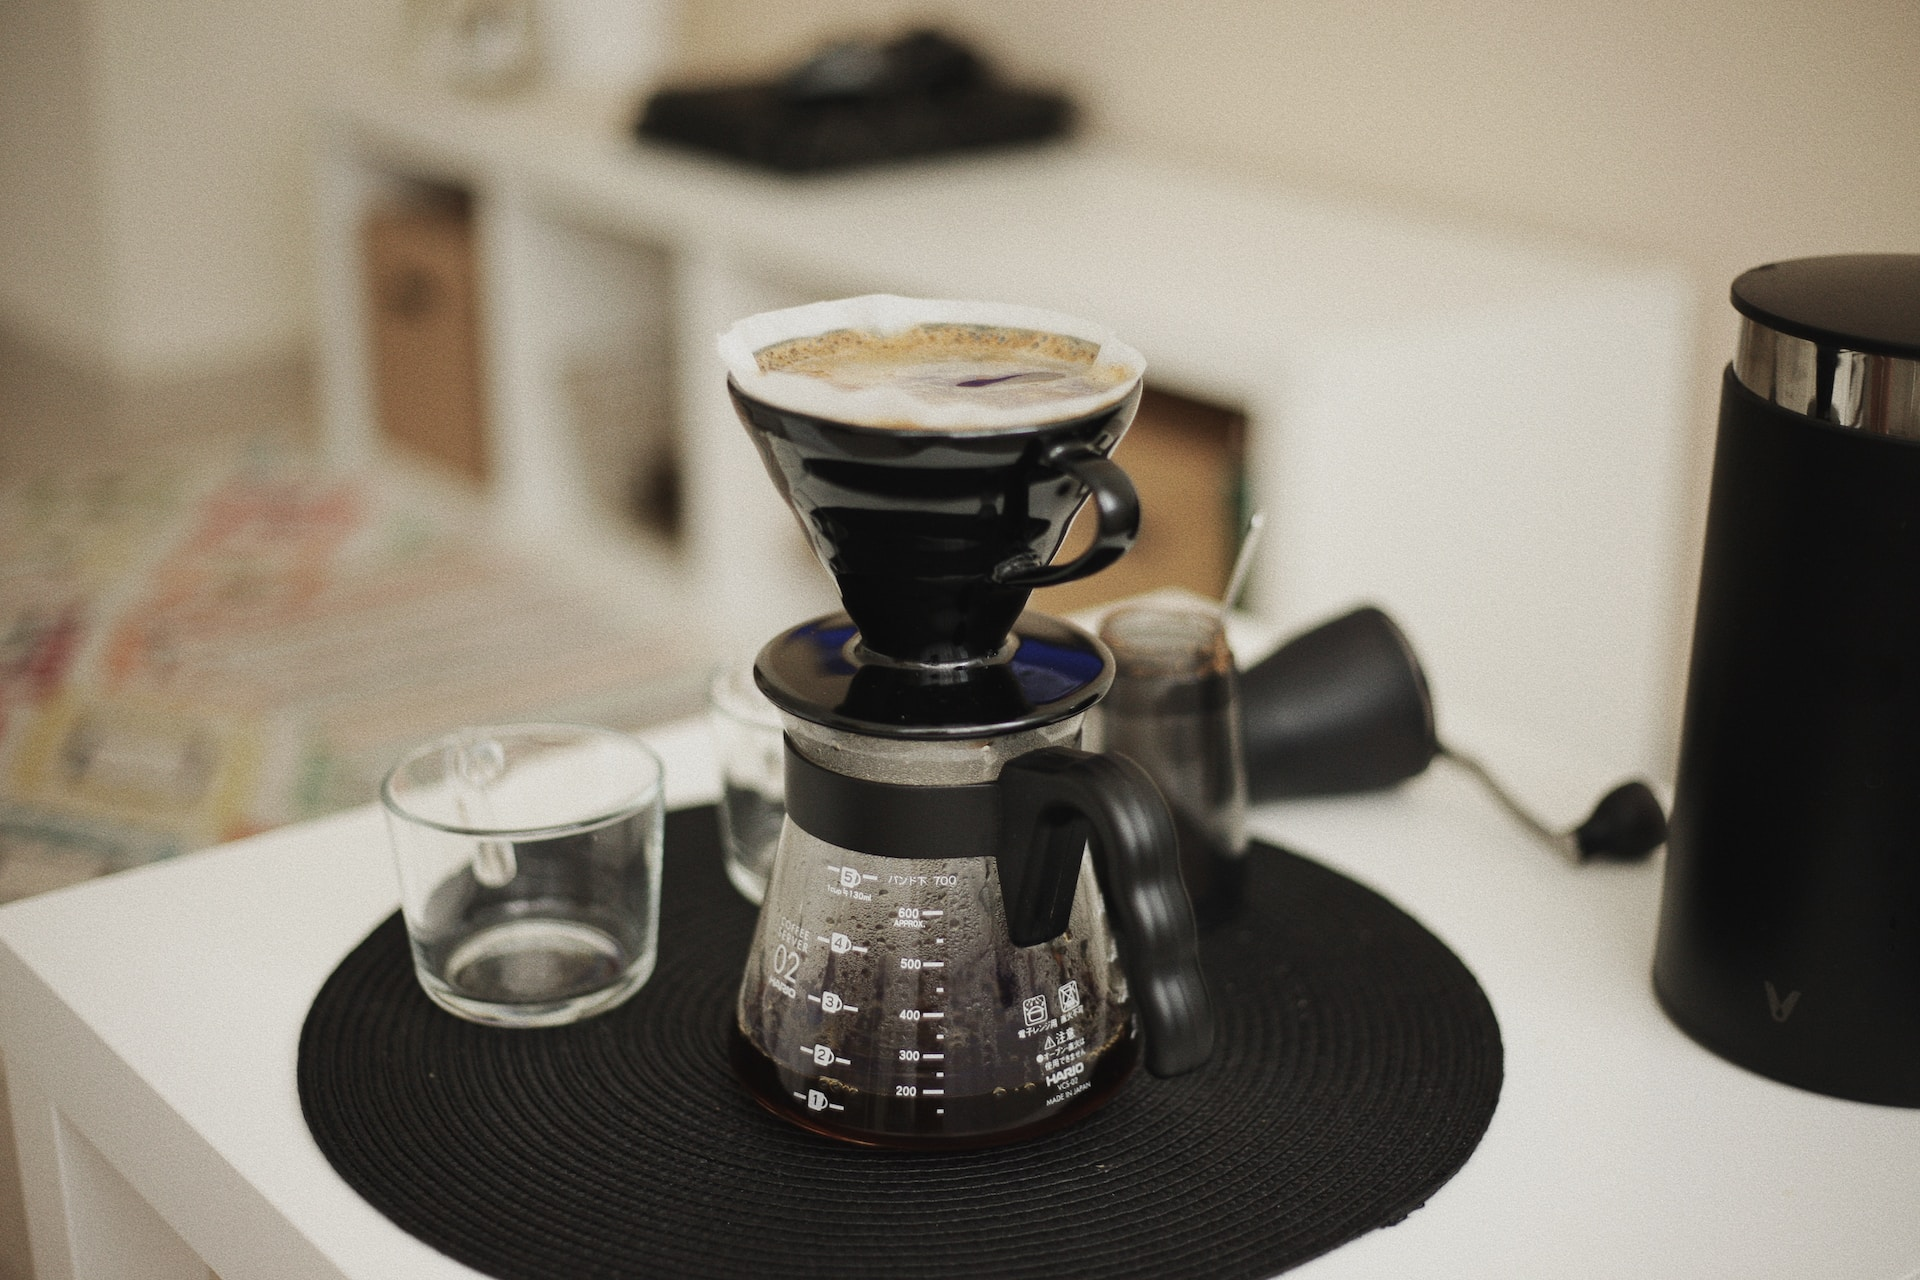
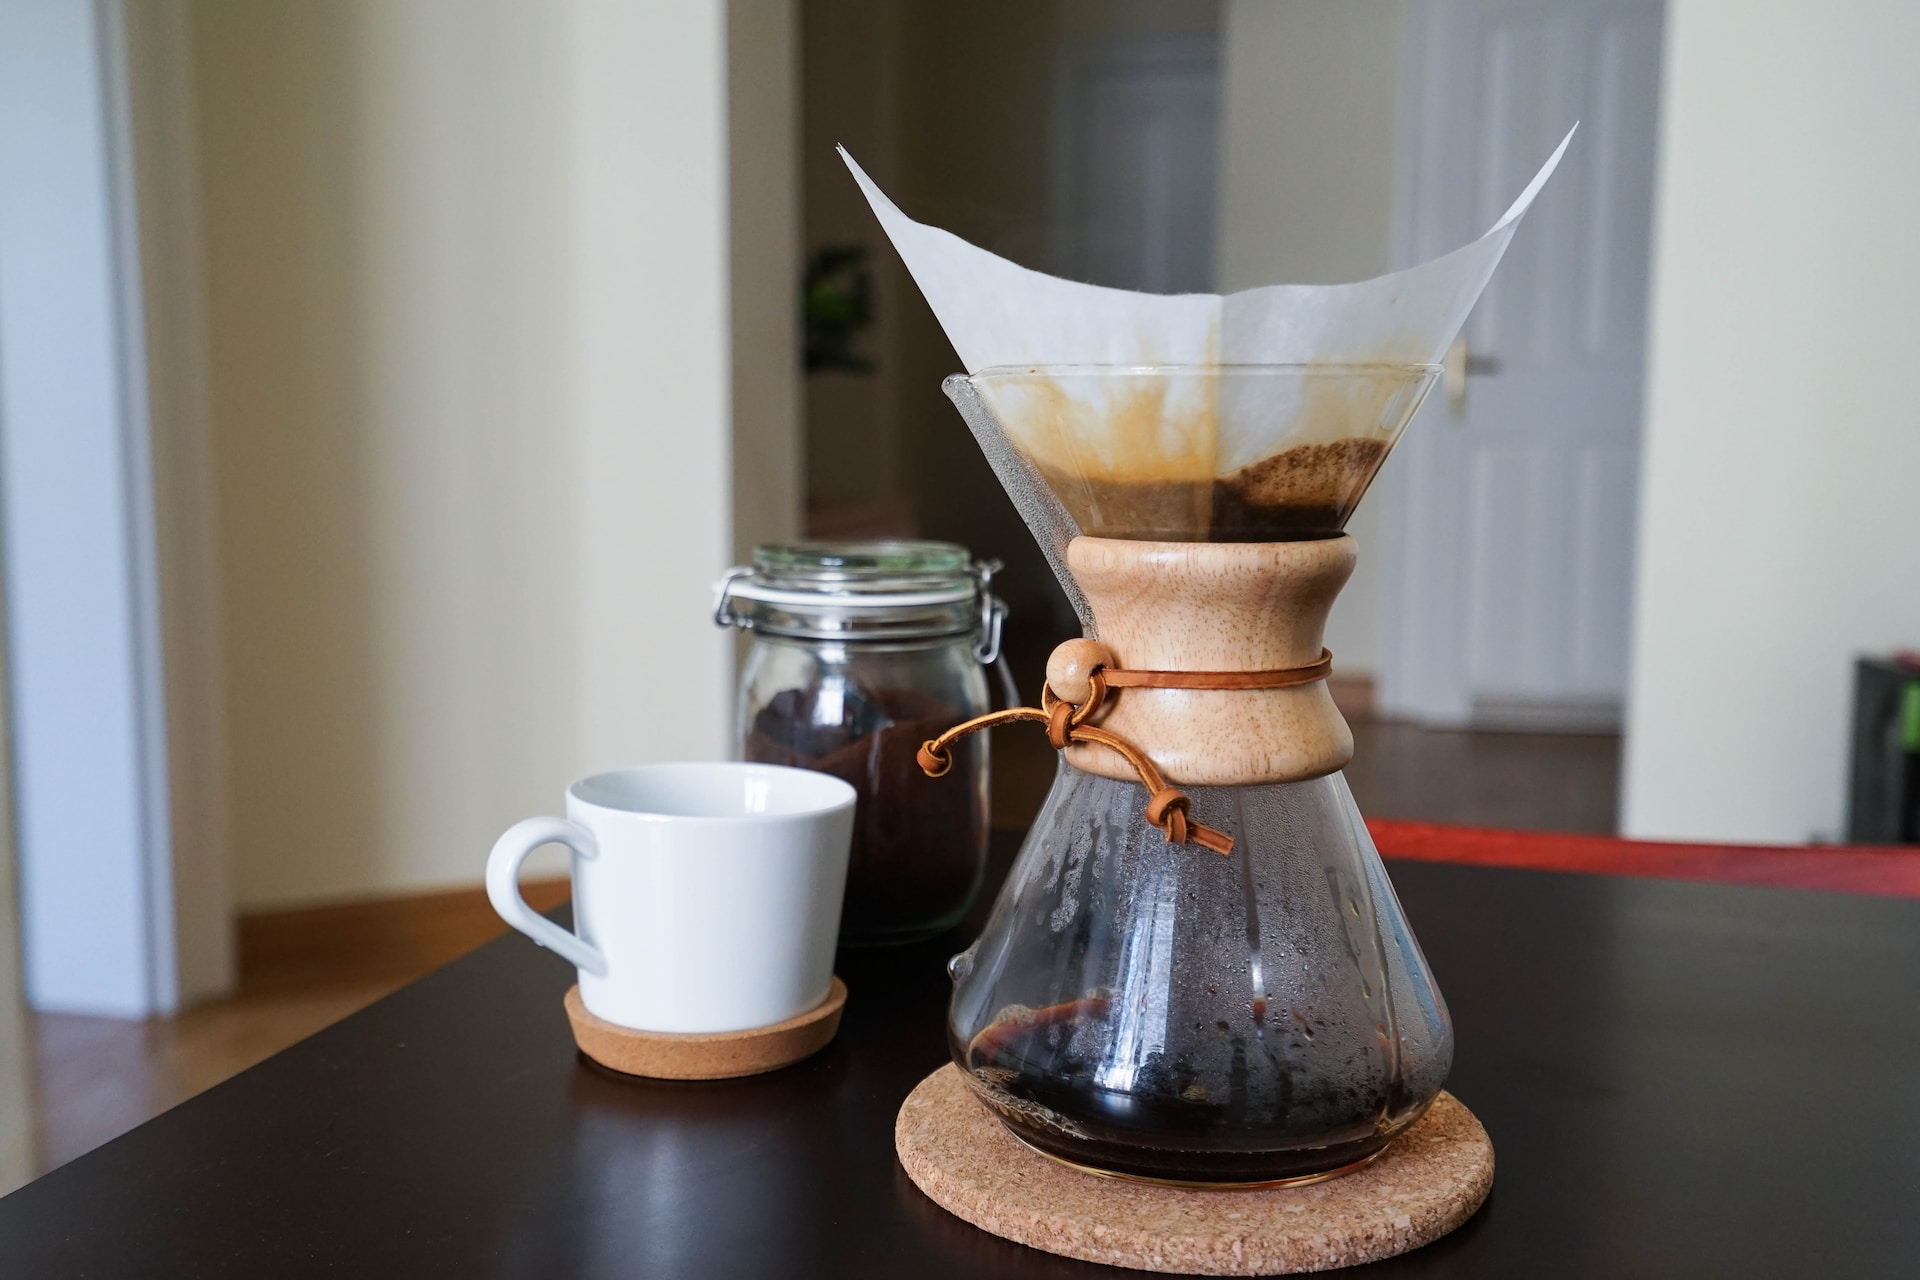
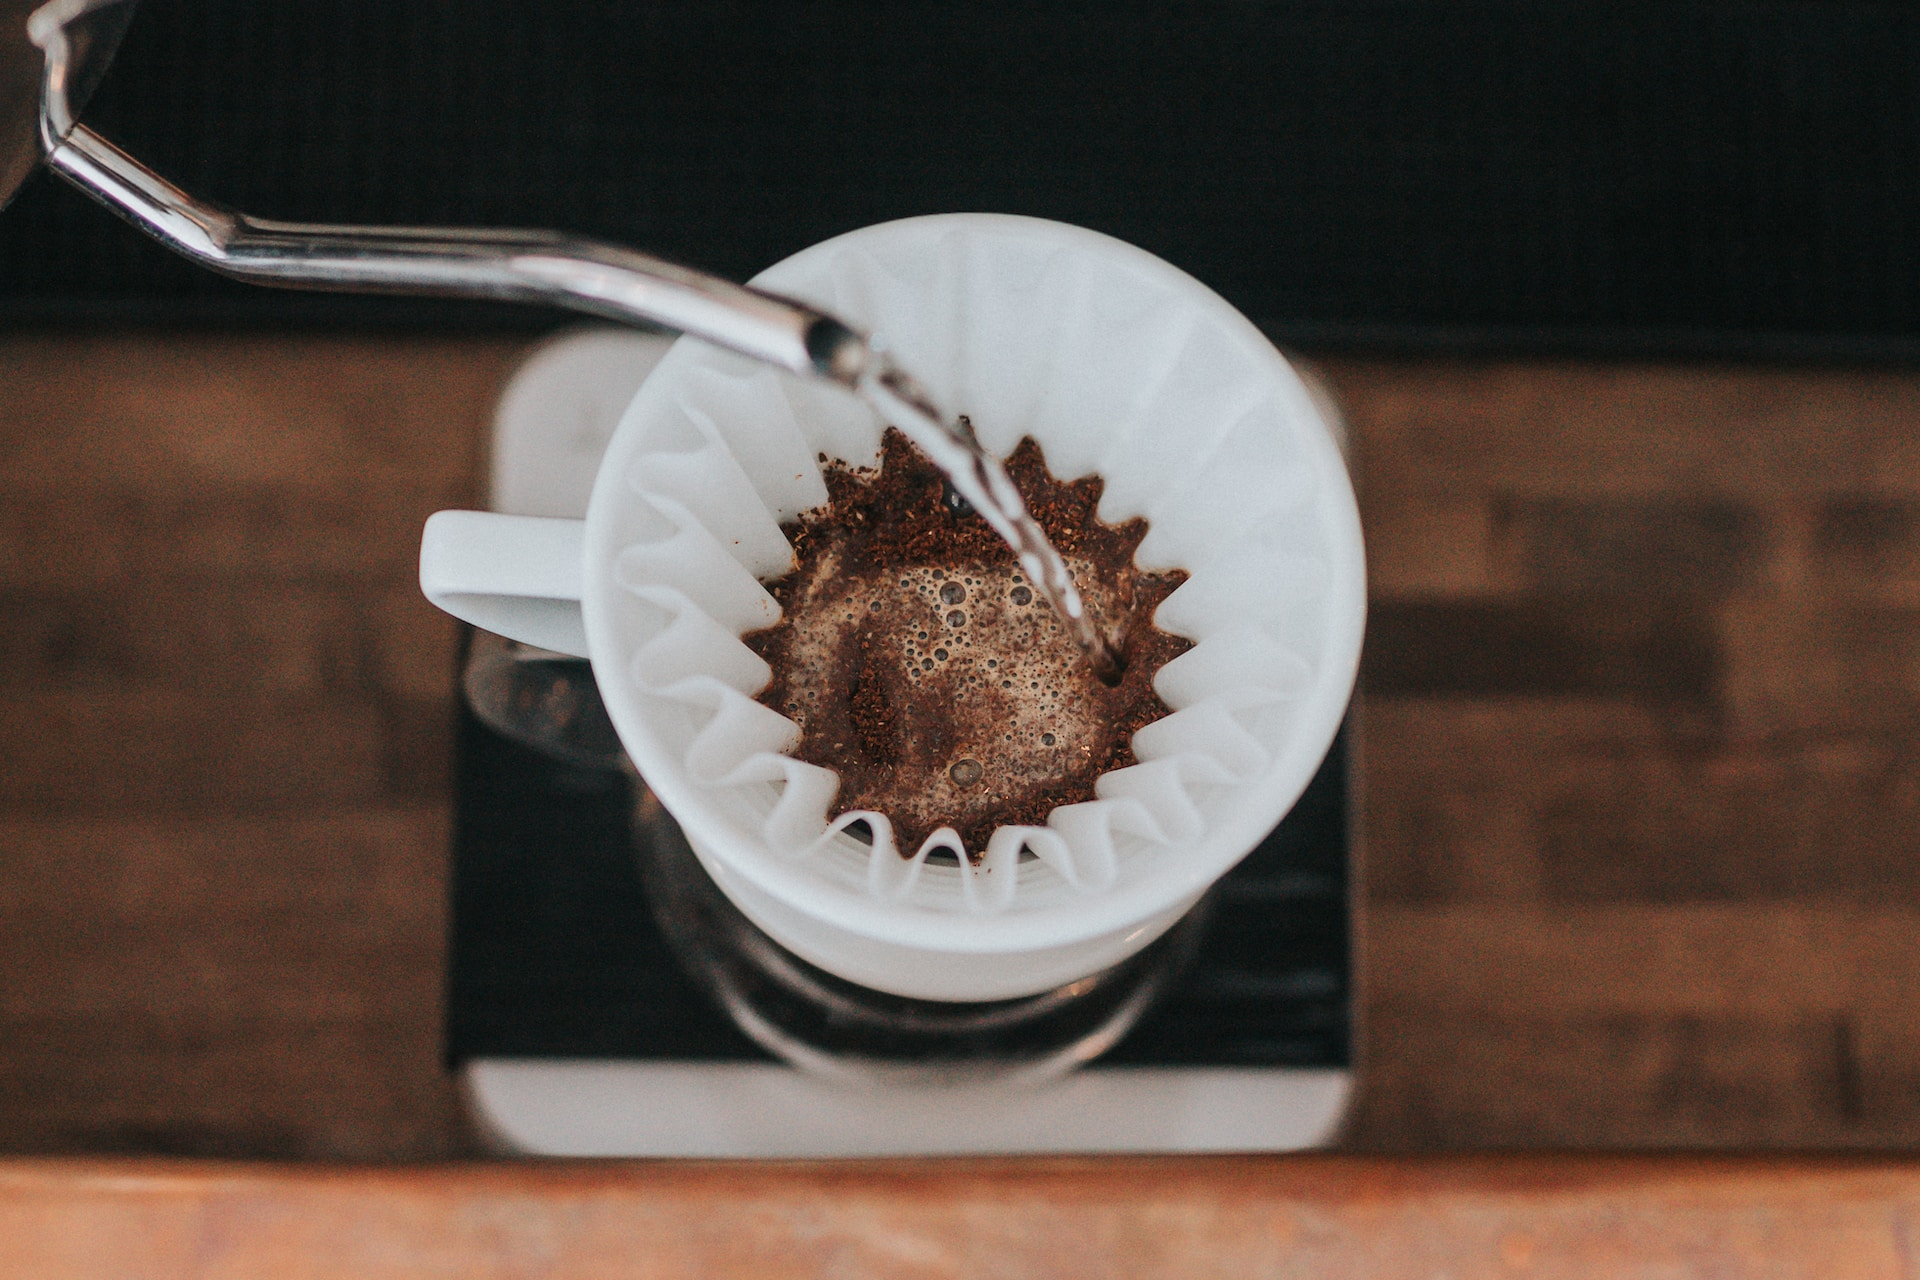
Pour Over Coffee Cones
A Meditative Ritual of Flavor Unfolding Drop by Drop
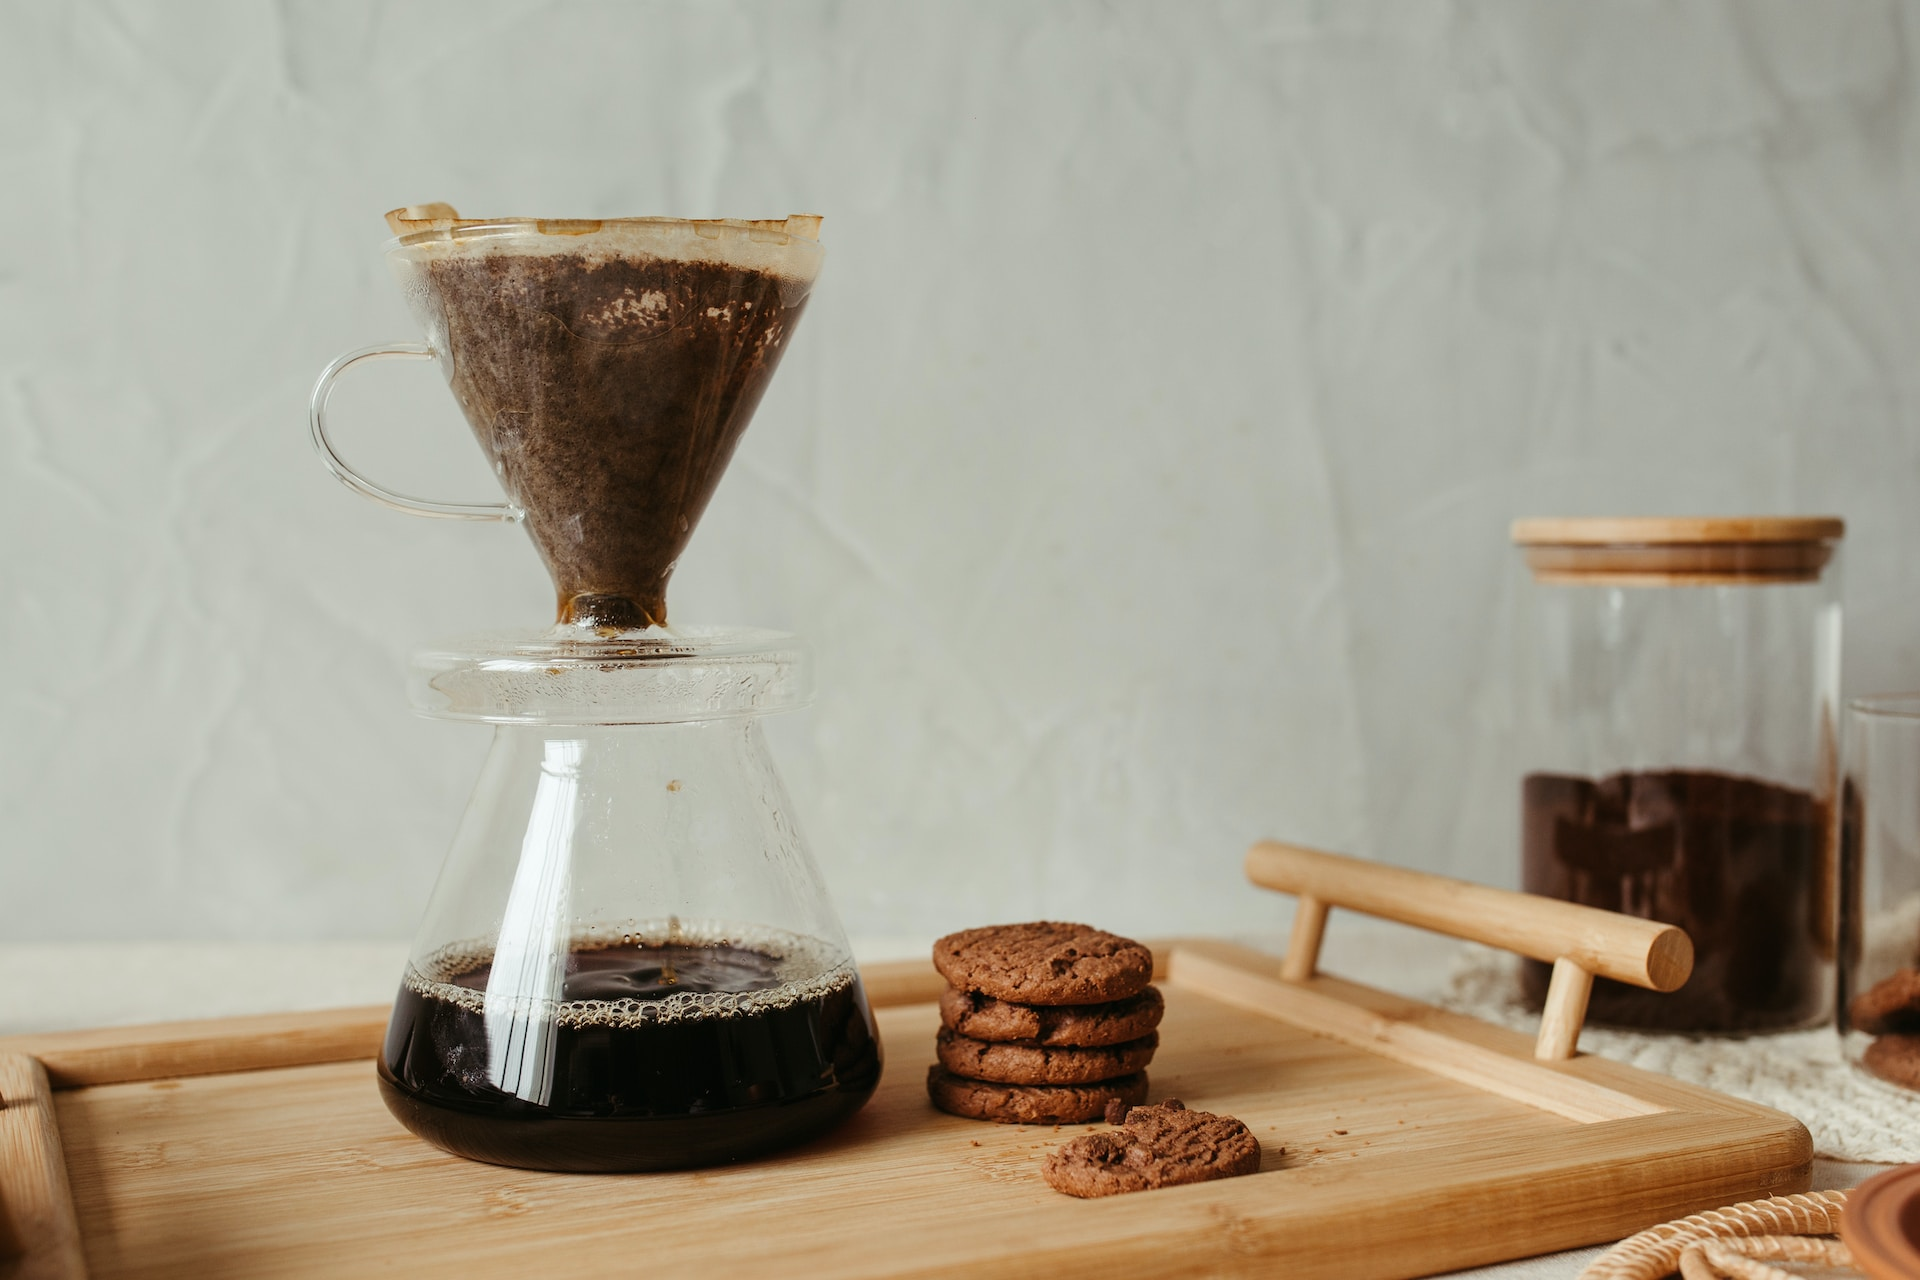
Pour-over coffee cones are as much about the journey as the destination. This method is a peaceful whisper in a noisy world, a mindful immersion into brewing art.
With just good ol' gravity as your partner in crime, watch as the water gently trickles through the grounds, merging into a symphony of delicate flavours in your cup.
It's a soothing ritual - carefully pouring the water in hypnotic spirals over the filter, then waiting patiently as it drips into your mug.
Takes a steady hand and a curious spirit, but tune into the meditative flow, and you'll be rewarded with a mighty fine cup of joe - clean, nuanced, and bright.
Pour over cones turn brewing into a mindfulness practice. Be present as the flavours unfold, and you'll experience your morning coffee anew.
Choose this if: You want to taste every intricate flavour note, appreciate a clean cup, and don't mind a slower brewing process. Also ideal if you want to make cold brew coffee.
Who it's for: Coffee purists and hobbyists who favour cleanliness, control, and absolute extraction of the coffee's finest qualities.
What You Need
-
Pour over coffee cone (like a V60 or Kalita Wave)
-
Freshly roasted coffee beans, ground to medium-fine texture
-
Hot water (between 93-96°C/200-205°F)
-
A gooseneck kettle (for optimal control while pouring)
-
Coffee filter
-
Timer
-
Scale (optional, but helpful)
Difficulty Level: Mindful Mastery (4/5)
Step-by-Step Instructions
-
Prep your coffee cone by placing the filter inside, following the shape of the cone.
-
Set the cone atop your favourite coffee mug or carafe and rinse the filter with hot water. This process warms your brewing equipment and diminishes any residual paper taste from the filter. Be sure to discard the rinse water.
-
Measure your coffee beans. A commonly favoured ratio is 1:16 (coffee to water), so for instance, 20g of coffee would pair well with 320ml of water. Adjust to suit your palate.
-
Grind the beans to a medium-fine consistency, resembling table salt.
-
Transfer the grounds to the coffee cone, and make a small indentation in the centre using your finger.
-
Start your timer and gently pour just enough hot water (93-96°C/200-205°F) into the indentation to soak all the coffee grounds without overflowing. This 'blooming' stage should last around 30 seconds, enabling trapped gases to escape and promoting even extraction.
-
Slowly and meticulously, pour the remaining hot water over the coffee grounds in small, circular motions, ensuring you cover them entirely. The pouring phase typically lasts between 2 to 3 minutes.
-
Let the flavorful water completely pass through the coffee grounds before removing the cone.
Pro Tips
-
A gooseneck kettle allows you greater precision in your pour, which ultimately helps in controlling extraction.
-
Aim to maintain a slow, steady, and controlled pour over the entire brewing process.
-
Experiment with variables like water temperature and pouring intervals to fine-tune your brewing skills.
The pour-over coffee cone, in its simplicity, beckons you to slow down and appreciate the nuance and rhythm of brewing. Each pour becomes an act of self-expression, every sip a testament to your patience and craftsmanship.
Fancy, hey?
Pour Over Chemex
The Timeless Harmony of Design and Flavor
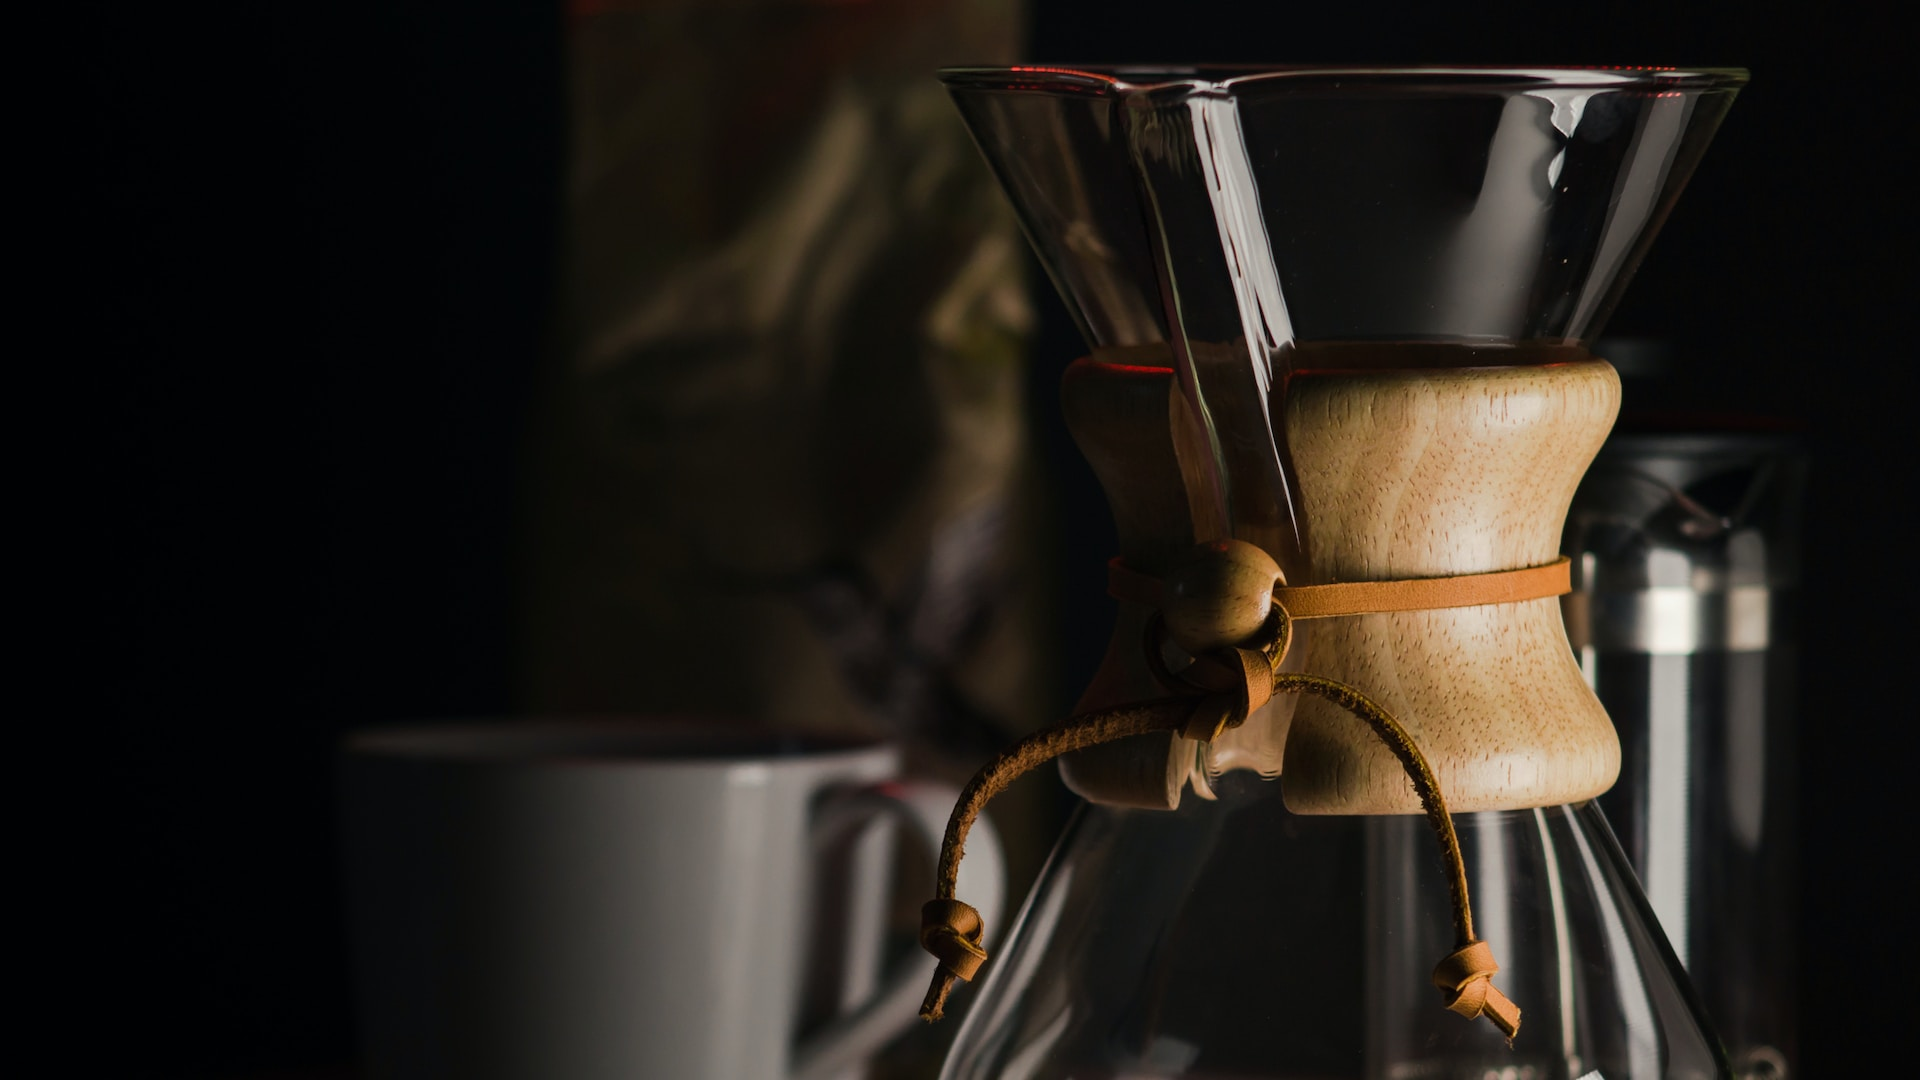
The Chemex is more than a coffee maker - it's an iconic design piece oozing function and elegance. This pour-over beauty is famed for delivering a clean, vibrant, refreshing brew.
Brewing with the Chemex ain't just about the coffee - it embodies a whole philosophy: precision, patience, and appreciating the art in a well-crafted cuppa.
It's a graceful dance - hot water slowly spiralling over those grounds, extracting all the flavours and oils in perfect balance. Nothing rushed, just a zen-like flow.
Choose this if: You have a patience for a slower brew appreciate the clarity of flavours and aesthetics in your coffee gear.
Who it's for: The contemplative brewer who enjoys clean, nuanced cups and loves the process as much as the drink itself.
What You Need
-
Chemex brewer
-
Freshly roasted coffee beans, medium-coarse grind
-
Hot water (between 90-93°C/194-200°F)
-
Chemex bonded paper filters
-
Timer
-
Scale (optional, but recommended)
-
Gooseneck kettle (for maximal pour control)
Difficulty Level: Elegant Experimentation (4/5)
Step-by-Step Instructions
-
Fold your Chemex filter into quadrants and place it at the brewer's top, ensuring the three-fold portion faces the spout. This prevents the filter from sticking to the spout and allows air to escape during the brewing process.
-
Pour warm water over the filter to not only clean it but also to warm the Chemex. Ensure to discard this water before brewing.
-
Accurately measure your coffee beans. A universally accepted ratio to start with is 1:15 (coffee to water). For example, use 50g of coffee for 750g (ml) of water.
-
Aim for a medium-coarse grind for your coffee beans, roughly akin to sea salt for a balanced extraction.
-
Position the ground coffee in the filter, levelling the surface to ensure even water contact.
-
Start your timer, then pour enough hot water (90-93°C/194-200°F) to soak the grounds comfortably. Let this 'bloom' for about 30 seconds, enabling the release of carbon dioxide, which can otherwise hinder the extraction process.
-
Continue pouring water in a slow, steady stream, primarily focusing on the centre but periodically moving outward in a circular pattern to ensure all grounds are included in the extraction process.
-
Allow all the water to pass entirely through the filter before removing it. Depending on your pour speed and grind size, total brew time should be between 4 to 5 minutes.
Pro Tips
-
A gooseneck kettle is preferred for more control over pour speed and water distribution.
-
Keep your pour rate and timing consistent to achieve a well-rounded and flavorful brew.
-
Play around with grind size, coffee-to-water ratio, and water temperature until you find what suits your taste buds best.
Stovetop Coffee Maker
The Soulful Symphony of Tradition and Flavor

The stovetop coffee maker, or Moka pot, keeps things simple and traditional. It celebrates the fusion of heat, pressure and your choicest beans.
This little beauty's cherished for its honest and robust style. It unveils an orchestra of deep, smooth flavours with a feisty finish - just like the passionate Italian coffee culture that birthed it.
The Moka pot stays true to the soul of coffee. No fancy bells or whistles, just quality beans meeting steam and pressure for an authentic, old-school cup.
Choose this if: You enjoy a potent brew, need a coffee maker that doesn't require power, and appreciate simple, classic design.
Who it's for: Coffee drinkers needing a concentrated brew, campers or travellers who can heat water via stove, and fans of vintage, classy kitchenware.
What You Need
-
Stovetop coffee maker (Moka pot)
-
Freshly roasted coffee beans, ground to medium or slightly coarse texture
-
Water
-
Heat source (stove)
-
Timer (optional)
Difficulty Level: Rustic Reverie (2/5)
Step-by-Step Instructions
-
Begin by disassembling your Moka pot into its three components: the bottom chamber, the coffee basket, and the top chamber.
-
Fill the bottom chamber with cold water until it just reaches the safety valve. Remember to avoid surpassing this point to ensure safe brewing.
-
Measure your coffee beans according to the size of your Moka pot. As a rule of thumb, fill the coffee basket evenly until it's fully stocked, but without pressing the grounds down.
-
Position the ground coffee in the basket and fit it onto the bottom chamber.
-
Screw the top chamber onto the bottom half. Confirm it's tight but resist over-tightening.
-
Place the Moka pot onto your heat source and keep the lid open. Allow the coffee brewed to ascend into the top compartment slowly.
-
Remove the coffee maker from the heat as soon as you hear a gurgling sound or see the coffee stop flowing to its upper chamber.
-
Pour immediately to experience the vibrant heat and distinctive flavour profile of stovetop coffee.
Pro Tips
-
Using freshly boiled water in the bottom chamber can help prevent over-extraction.
-
The grind size shouldn't be too fine to avoid a silty brew.
-
Experimenting with the heat on your stovetop can assist in controlling the speed of your brew and the strength of your coffee.
The stovetop coffee maker invites you to engage in an age-old coffee-making tradition. It's a tool of simplicity, but don't let that disguise its ability to brew a profoundly rich and hearty cup of coffee.
With each brew, you're signing up for a bold and nostalgic coffee experience that echoes and honours the rich, coffee-infused narrative of yesteryears.
Vacuum Siphon Coffee Maker
A Taste of Theatre in the Dance of Vapors and Aromas
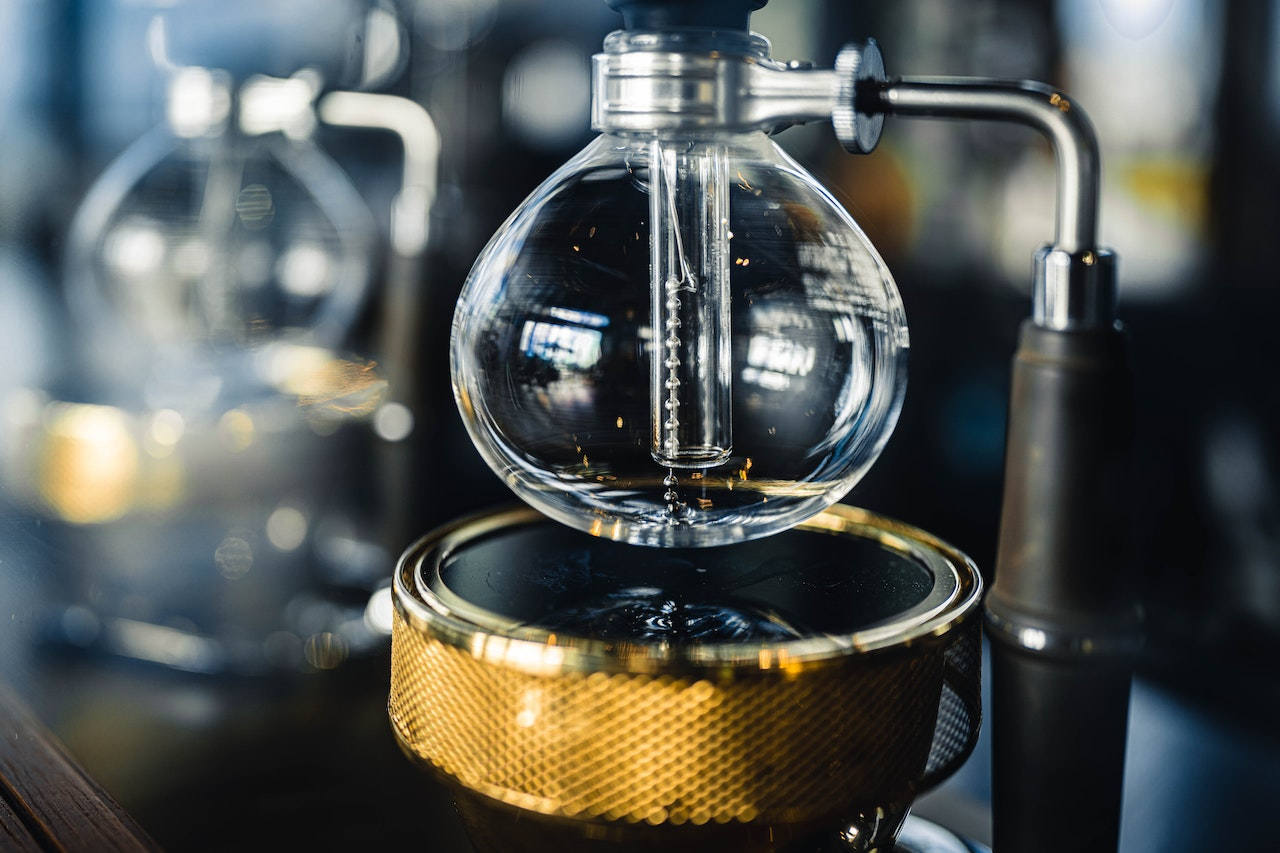
Part scientific experiment, part coffee brewing marvel, the vacuum siphon coffee maker captivates and promises a uniquely aesthetic brewing process, rising beyond the functionality to become an object of fascination.
Designed to playfully defy gravity, the vacuum siphon (also known as a vacuum pot) marries vapour pressure and vacuum to create a cup that is clean, velvety, and brimming with layered flavours.
Embark on an intoxicating journey to the intersection of chemistry and the culinary arts with the visually stunning, sensorial, enthralling vacuum siphon brewer.
Choose this if: You're after complex flavours, enjoy the spectacle of brewing, and don't mind a bit of a learning curve.
Who it's for: Coffee hobbyists seeking the smoothness of filter drip with the flavoursome body of a French press, and those not averse to some coffee chemistry in the kitchen.
What You Need
-
Vacuum siphon coffee maker
-
Freshly roasted coffee beans, ground to medium texture
-
Water
-
Heat source (butane burner, alcohol burner, or electric heater)
-
Timer
-
Scale (optional but recommended)
Difficulty Level: Spectacular Science (5/5)
Step-by-Step Instructions
-
Begin by filling the bottom chamber of the vacuum siphon with water. A good starting point is a 1:15 coffee-to-water ratio.
-
Connect the top chamber with the bottom one. The connection should be snug to create an airtight seal.
-
Position your assembled brewer on the heat source and apply medium heat. As the water heats, it'll start to create vapour pressure and ascend into the top chamber.
-
As soon as all the water rises into the top chamber, add your ground coffee and start your timer. Stir the coffee grounds gently to ensure even brewing.
-
Allow the concoction to brew for about 1-2 minutes.
-
Now comes the fascinating part: remove the vacuum siphon from the heat. As it cools, a vacuum is created in the bottom chamber, causing the aromatic brew to be filtered downwards through the siphon tube and back into the bottom chamber.
-
Disconnect the chambers after all the coffee is siphoned back into the bottom chamber, and it's ready to be served.
Pro Tips
-
Achieving the appropriate grind size is key. Too fine and you risk over-extraction; too coarse and the water might flow through too quickly.
-
Brew timing starts from the moment the water rises to the upper chamber – not from the start of the heat application.
-
For a more transparent, bright cup, consider using a cloth filter.
The vacuum siphon coffee maker permits exploration of an extraordinary brewing process, translating into a perfect cup of coffee. It's not just a conversation piece; it's an immersion into the very science that shapes the exquisite flavours hidden within each coffee bean.
With every brew, you don the hat of both a connoisseur and an alchemist, propelling coffee-making from the realm of the mundane into the enchantingly extraordinary.
How to Select Your Ideal Coffee Brewing Method
Choosing the perfect coffee brewing method for yourself is like unfolding a delightful mystery — it's about unveiling the brewing technique that resonates with your individual taste, preferences, and daily routine.
This choice acts as the bridge between the world of exquisite coffee aromas and the definitive flavours that you cherish in your cup.
Guidelines for Selection
Begin by diving deep into your daily life rhythms.
Are your mornings rushed or relaxed? Do you value the detailed artistry of brewing or favour a quick, hassle-free preparation?
Does the charm of hands-on brewing allure you, or do you lean towards the straightforwardness of an automated process?
Is your preference tilted towards a dense, bold brew or a delicate, bright one?
Are you just starting on your journey, and the answers to these questions still await you?
Don't worry; this is the most exciting place to be, so let's help you take your first steps.
If you're caught in a fast-paced whirlwind and have constraints on budget and space, a French Press or an Aeropress might be your perfect match — simple, speedy and compact, yet wonderfully capable of creating full-bodied brews.
For those who love to indulge in elaborate brewing rituals and can spare both time and budget, a vacuum siphon adds a touch of drama and sophistication, producing a beautifully aromatic and nuanced cup.
It can be pretty cool to start with a vacuum-level brewing station, but it may be so complicated you put yourself off. While you're free to make your own choice, we would recommend starting small and simple, getting to know some flavours, experimenting with different roasts, and then building up your coffee brewing methods from there!
Choosing Your Brewing Method
Weigh your preferences against each method's characteristics.
For instance, the pour-over method is celebrated for its clarity and control over variables, revealing layered flavours and bright acidity. The espresso, on the other hand, is all about intensity and rich crema, perfect for those who love a strong punch of coffee.
Consider your willingness to experiment, from adjusting grind size for a Chemex to playing with pressure on an Aeropress, each method offers a unique playground for the curious brewer.
Deciding on your ideal coffee brewing method is a personal quest, a journey that navigates through your lifestyle, taste preferences, and the deliciously diverse world of coffee.
Embrace this exploration with an open mind, and let it guide you to the coffee rendezvous that fills your cup and uplifts your senses each day.
Oh, and if you're planning on having cold brew coffee, a funnel and filter paper approach works ideally.
The Art of Brewing: A Symphony in Steps
The art of brewing coffee isn't just about the final sip - it engages all your senses. From the tempting aroma of fresh beans to the grinding's rhythmic hum, each step's a treat for the senses.
This immersive ritual transforms the casual drinker into a craftsperson, step by careful step. Keeping a keen eye on quality, taste and character, let's walk through home coffee brewing's story.
Choosing Beans
Before we start, we've gotta pick our beans. Single-origin or blends, complex African or mellow South American, light or dark roast - each choice shapes a different tale in your cup. Look for quality, freshness and flavours that really push your buttons.
Grinding
Next up's the grind, crunching whole beans into a fine powder. The size here dramatically changes your brewing game. It should match your chosen method. Too coarse, and your coffee might taste sour and under-extracted. Too fine, and it could get bitter and over-extracted. Find a grind that grooves with your gear.
Measuring
Stand on the solid ground of coffee-to-water ratios for precision. This delicate balance determines a cup's strength and flavour extraction. A good starting point is a 1:15 ratio.
Brewing
Now the magic happens! Water temperature, time and technique deliver that flavour symphony into your cup. Different methods need different techniques but stay focused on coaxing out the coffee's essence in each brew. Playing with the variables helps you nail that perfect personalized cup.
Sipping
Finally, savour your patient work's reward. Inhale the enveloping aroma, then sip, taste and explore the complex flavours.
Brewing coffee's both science and art, needing precision but inviting creativity. Each step grows your coffee smarts, opens new horizons to try, and deepens your appreciation for that humble yet wonderful cup you savour daily.
Conclusion
We've now walked through the wonderland of home coffee brewing - picking those perfect beans, finding the brewing method that suits our spirit, and mastering the finesse of grinding and variables for our ideal flavour symphony.
Let curiosity lead as you try diverse beans, explore different brewing possibilities, and dial-in techniques to create your perfect personalized cup.
With passion in our hearts and inspiration in our minds, let's embark on this exciting home-brewing journey together. Into a kingdom of exquisite beans, rich aromas and soul-stirring flavours we go, as artisans crafting our own coffee masterpieces.
The only step left is your first sip! Don't just think about it - grab some beans and get brewing.
Experiment, taste and find your coffee bliss.
You've got this, mate! I can't wait to hear how your coffee adventures unfold.
Leave a comment